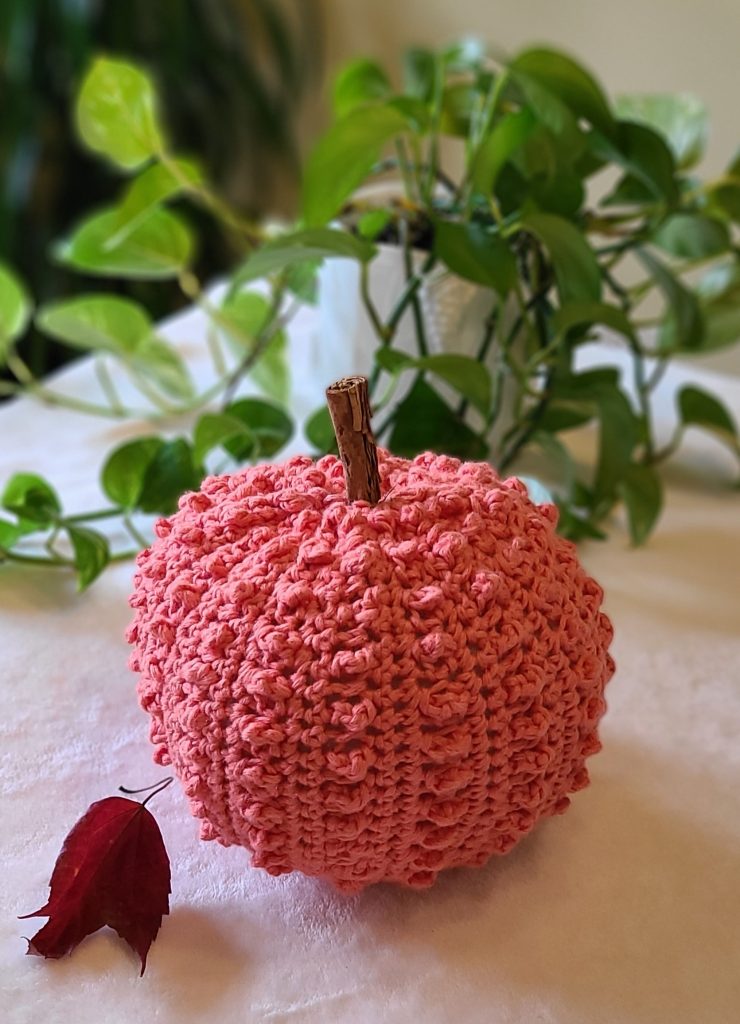
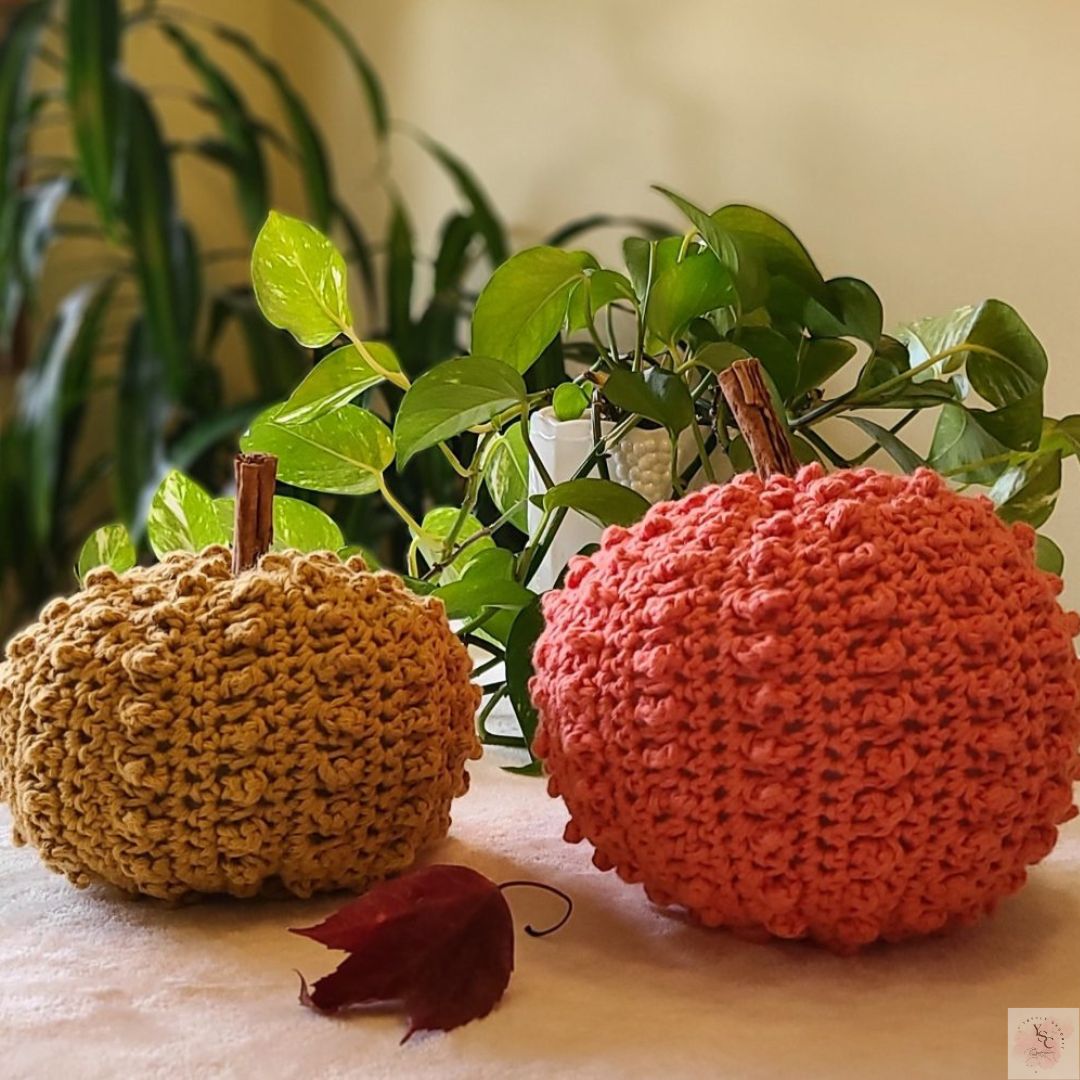
Get ready for autumn with this simple, beginner friendly crochet pumpkin. This free pattern effortlessly combines simplicity with creativity, making it an ideal project for both seasoned crocheters and those new to the craft. With just a three-row repeat, the instructions are easy to follow, requiring only single and triple crochet stitches.
Charming Fall Decor
This crochet pumpkin pattern offers an opportunity to craft charming fall decorations, perfect for adorning your home or showcasing at seasonal craft fairs. What’s more, the basic pattern can be tailored to create pumpkins of varying sizes—ranging from medium to small—suiting your specific preferences.
Beginner Friendly
This pattern is beginner friendly, and you only need to know basic stitches are how to crochet in rows. I have also included a description of how to do single and triple crochet stitches, in case you are unfamiliar. If you require more detailed visuals, please check out the video tutorial. Get ready to infuse the spirit of autumn into your surroundings with my free Crochet Pumpkin pattern!

Crochet Pumpkin: Free Pattern
Notes:
- Pattern is written using US terms
- Finished Measurements: 5in x 5in
- This pattern is very simple, and adjustable in any size.
Level: Easy +
Materials
- Yarn: Loops & Threads Cotton Yellow and Orange [50 g/1.7oz] or substitute with any yarn.
- 5 mm crochet hook
- Tapestry Needle
- Scissors
- Stitch Markers
You can substitute other types of yarn to change the size of your pumpkin. Choose a DK or Sport weight for a smaller pumpkin. Choose a bulky yarn or even a super-bulky weight yarn for a larger pumpkin. Whichever weight yarn you choose, make sure to use a crochet hook that’s works with that size of yarn.
Video Tutorial
Abbreviations
- Ch: chain
- Sc: single crochet
- Tr: triple crochet
- Eor: end of row
Stitches Used
Single crochet: Insert hook into next chain, take a loop, you have two loops on your hook, yarn over and pull through all.
Triple crochet: Yarn over two times then insert hook into next chain, yarn over hook and draw yarn through stitch, you have 4 loops on your hook, loop yarn over hook and draw through two loops (3 loops remaining on your hook), yarn over hook and draw through two loops, and again loop yarn over hook and draw through the last two loops on the hook.

Crochet Pumpkin Pattern
If you want your pumpkin to be wider, you have to start by chaining more chains, just be sure to keep it an even number.
Ch 26
Row 1: Sc in the 2nd ch from hook, sc in each chain until eor. (25)
Row 2: Ch 1, turn, sc across. (25)
Row 3: Ch 1, turn, sc in the same st, tr in next st, *1sc, 1tr* until eor, sc in last st.
Row 4: ch 1, turn, sc across.
Row 5, 6: Rep Row 2.
Row 7: Rep Row 3
Row 8: Rep Row 2
Row 9, 10: Rep Row 2
Alternate this combination of 3 rows until you have 58 rows

Last Row: You can make the last row and seam the short sides in the same step. To do this, fold the short sides together, right sides facing out. Insert the hook through both the starting chain stitches and the back loops of the working stitches as you crochet the last row – all slip stitches.
Finishing
If you didn’t join the sides as you worked the last row of crochet (as described in the previous section), join the sides with a mattress stitch.
Then, turn the pumpkin so that the raised “V” shapes point down.
With a matching piece of yarn and tapestry needle (I used the long yarn tail) sew a running stitch along the top edge.
Pull the ends of the yarn to gather the top edge. Tie a knot, cut the excess yarn, and weave in the ends.
Next, stuff the pumpkin with fiberfill through the bottom opening.
In the same way as before, sew a running stitch along the bottom edge. Pull the ends of the yarn to gather the bottom edge. Tie a knot, cut the excess yarn, and weave in the ends.
For a simple stem, you can use hot glue to attach a short twig or a cinnamon stick to the top of the pumpkin.
Or, you can attach a crocheted stem.
Thank You For Choosing My Free Crochet Pumpkin Pattern!
I hope you enjoyed making this festive crochet pumpkin! If you have any additional questions, leave a comment and I will get back to you .
Share on Instagram or Facebook: When you make this project, share it on social media and tag me @yelenastylecrochet. I love to see what you make!