Cozy Up Your Space: Crochet Granny Square Pillow Cover Free Pattern & Video Tutorial
Looking to add a pop of handmade charm to your home décor? There’s no better way than with a timeless crochet granny square pillow cover! Whether you’re a seasoned crocheter or just getting started, this project is perfect for bringing warmth, color, and texture into any room.
In today’s post, I’m excited to share a crochet granny square pillow cover free pattern that’s not only beginner-friendly but also endlessly customizable. Plus, I’ve included a step-by-step video tutorial to guide you through the process—from your first chain to the final stitch. If you’ve been searching for a beautiful and practical crochet pillow cover free pattern & video tutorial, you’ve landed in the right place.
We’ll walk through how to make classic granny squares, join them into a neat pillow front, and finish it off with a polished backing. So grab your hook, pick your favorite yarn colors, and let’s get started!
Level: Easy +
Notes:
– This pattern is written in US terms
– Magic Ring or Ch 5 and join.
– Ch 3 at beginning of row counts as first dc.
– You can substitute any other weight 4 yarn
– The pattern is coming with a video tutorial available on my youtube channel YelenaStyleCrochet.
Materials:
– Yarn: 3 skeins of cotton I Love This Cotton color Bruschetta
– You may substitute any type of yarn you have on hand
– 5 mm / H-8 hook
– Tapestry needle
– Scissors
– Yarn needle
Abbreviations:
* *: repeat instructions within asterisks defined number of times
[ ] These instructions go in same stitch
Ch: chain
Dc: double crochet
Eor: end of row
Rep: repeat
Mr: magic ring
Sk: Skip
Sl St: Slip Stitch
St: stitch(es)
Sp: Space
Crochet Granny Square Pillow Cover Video Tutorial
Gauge
13 dc * 7.5rows = 4in*4in
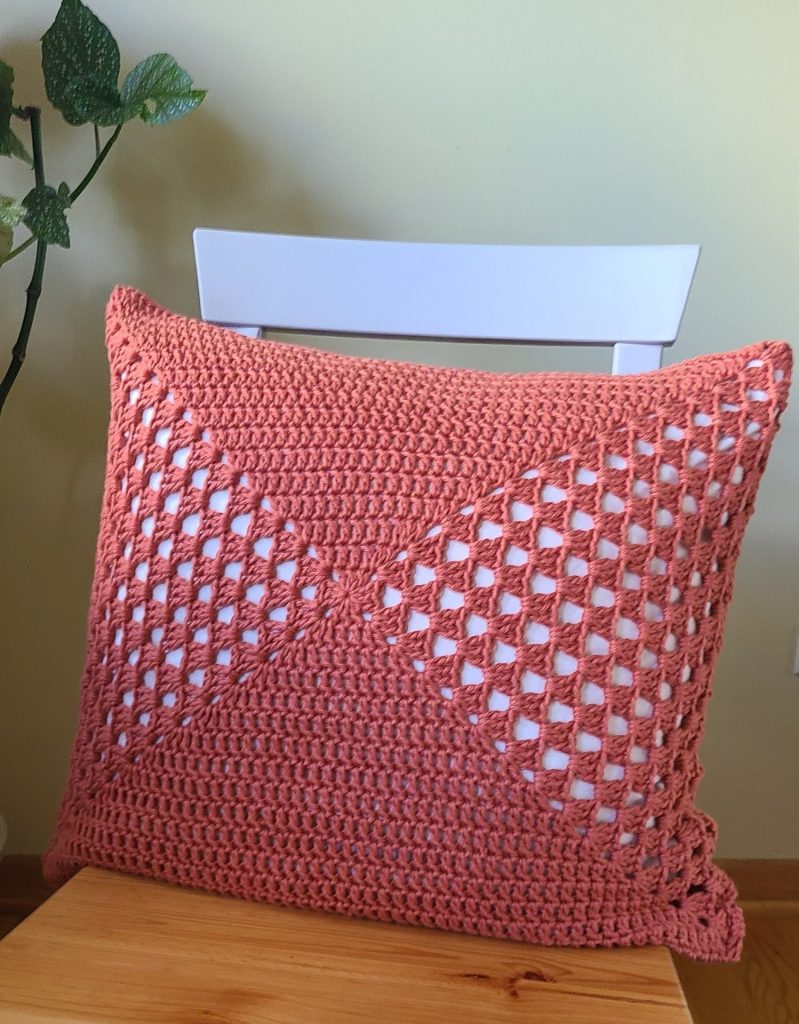
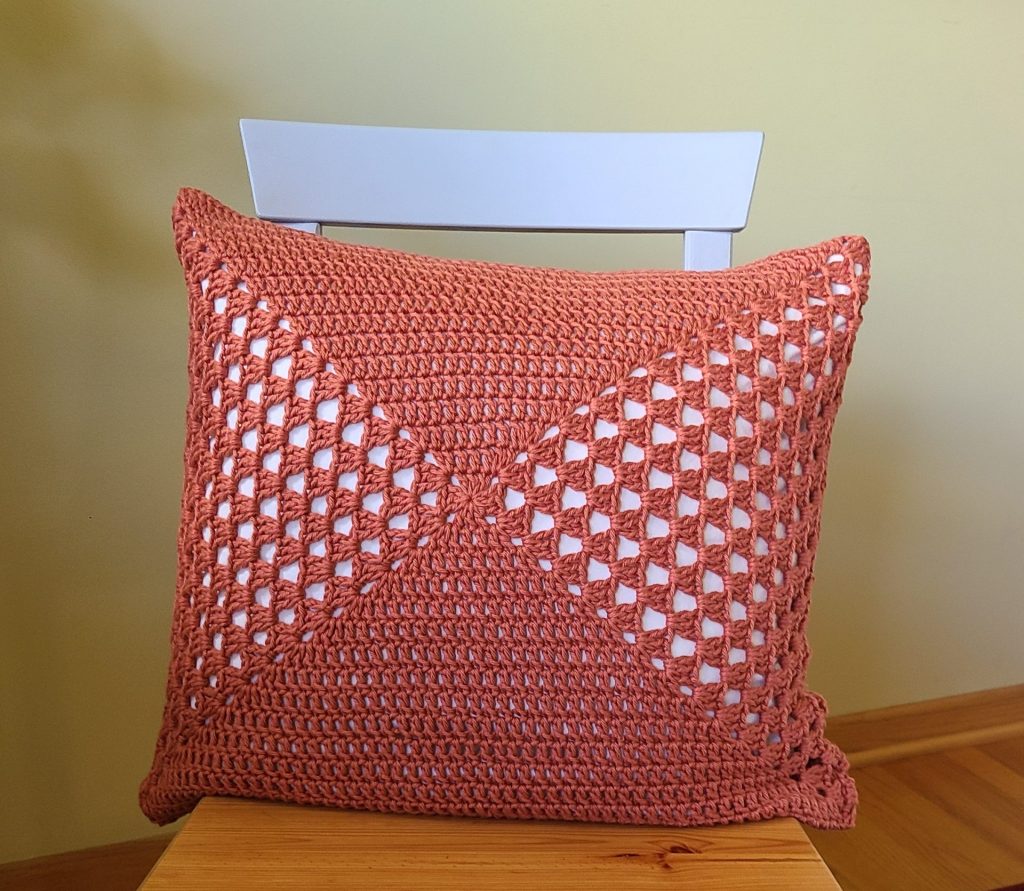
Finished Measurements
18 in W * 18 in H
Pillow size 20 in x 20 in
Crochet Granny Square Pillow Cover Pattern
Basic granny square
Make 2
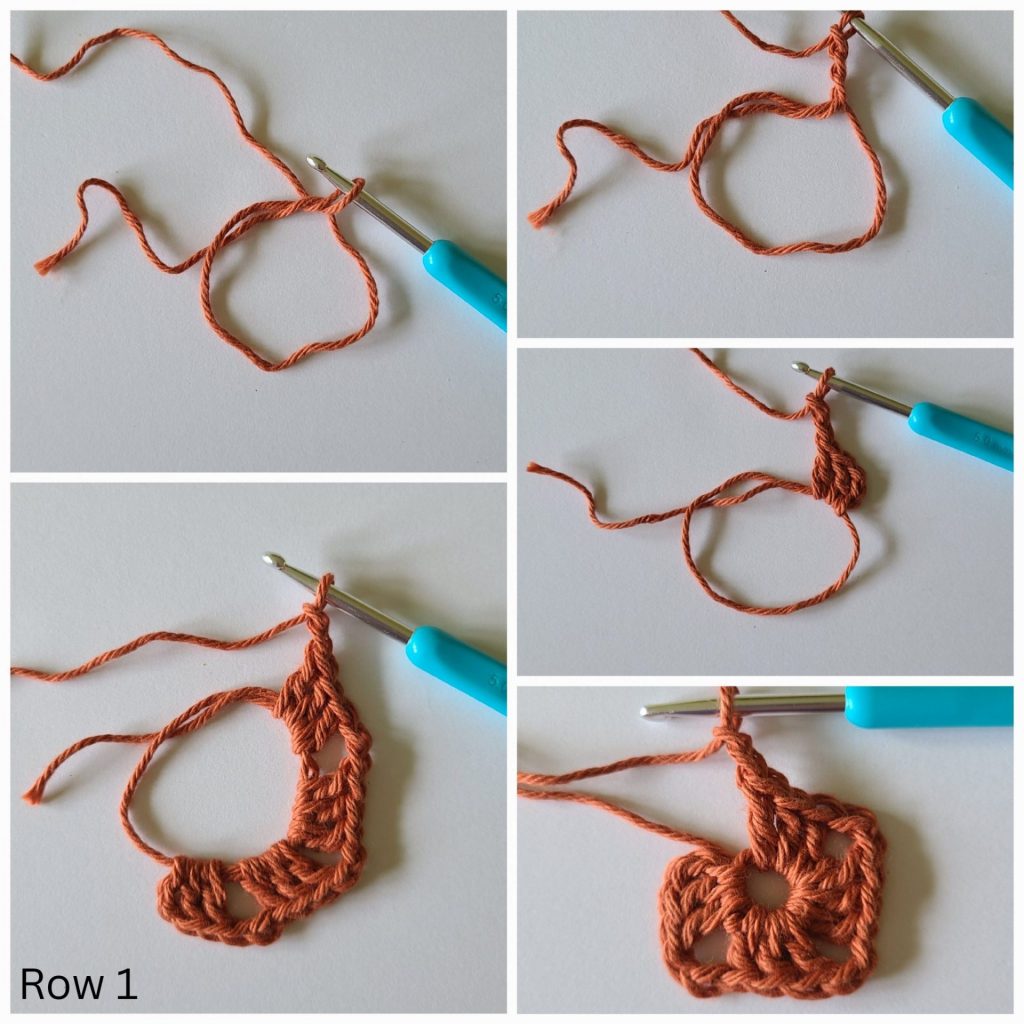
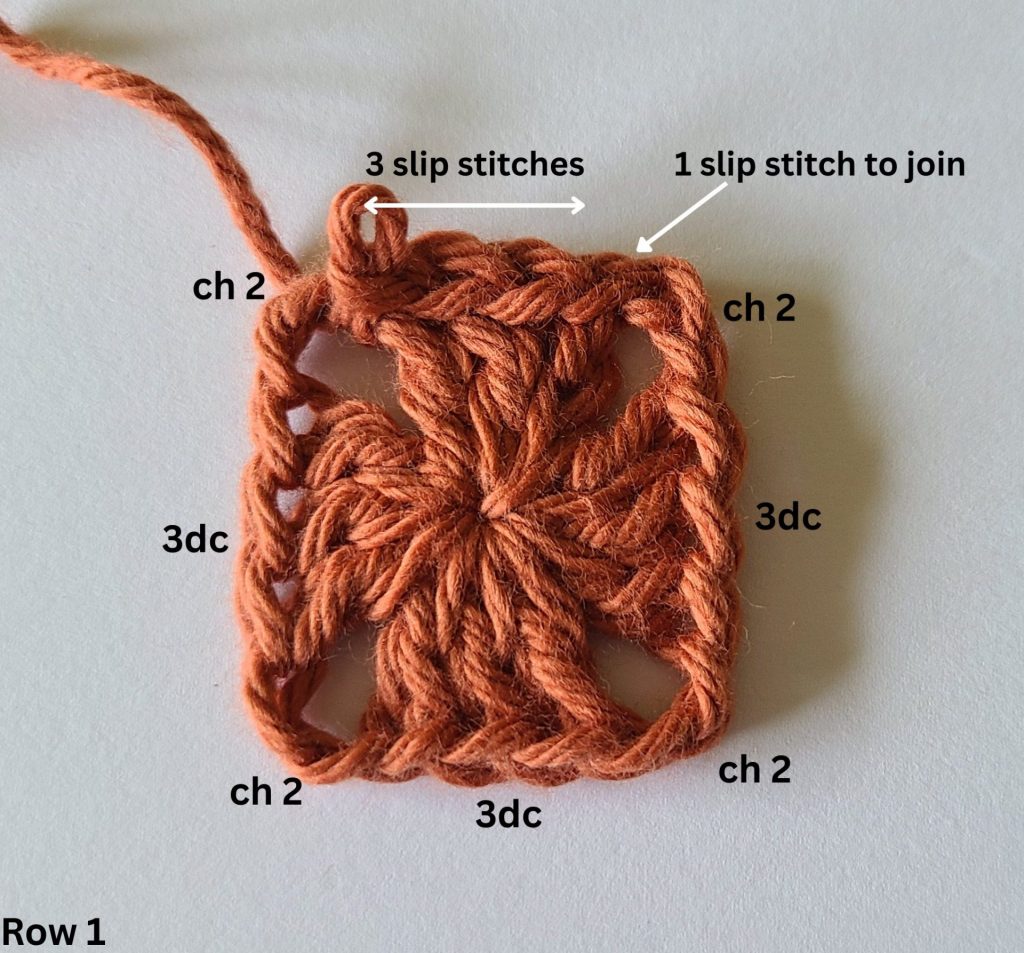
MR (or ch 5, sl st to make a ring)
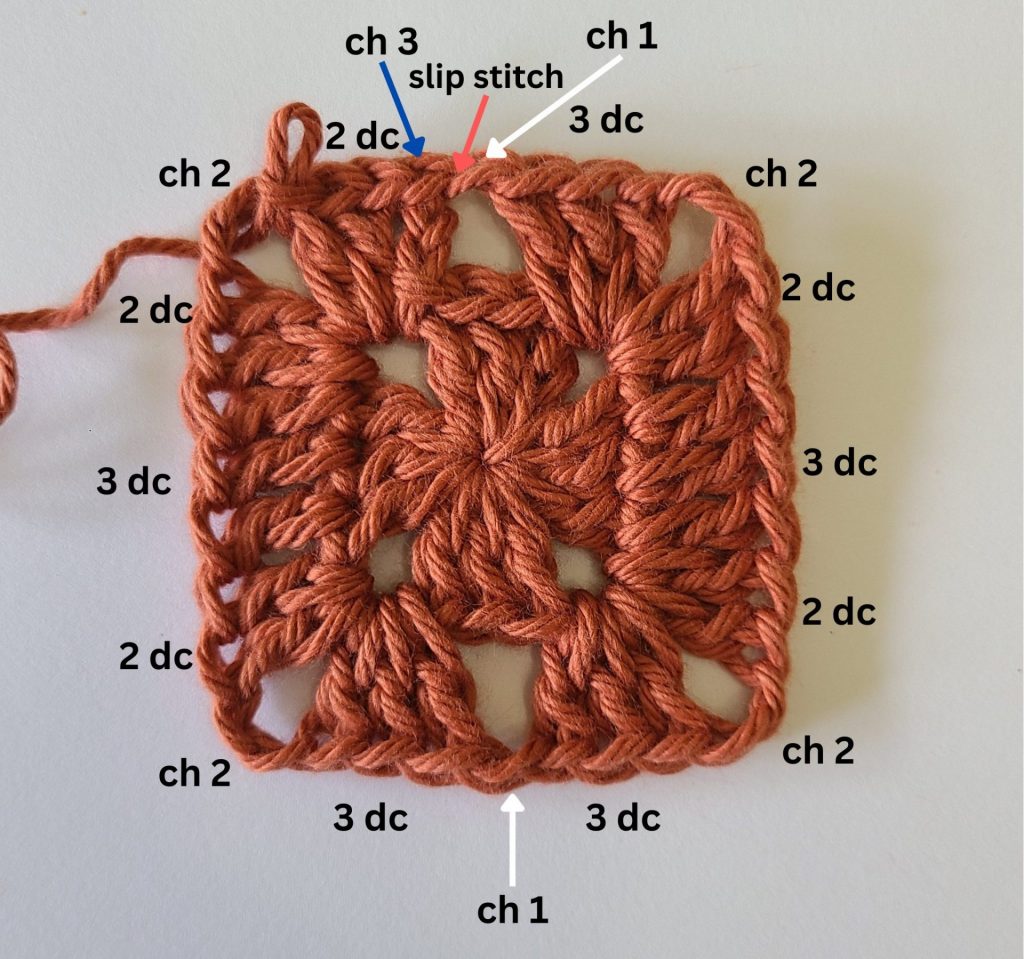
Row 1: Ch 3, 2 dc, ch 2, 3 dc, *ch 2, 3 dc* rep 3 times, sl st to top of ch 3 to join.
Row 2: Sl st 3x (to corner), ch 3 (counts as 1st dc), in corner space: [2dc, ch 2, 2dc], dc into next 3 stitches, in corner sp: [2dc, ch 2, 3dc], ch 1, in corner sp, [3dc, ch 2, 2dc], dc into next 3 stitches, in corner sp: [2dc, ch 2, 3dc], ch 1, sl st to join.
Row 3: Sl st 3x (to corner), ch 3 (counts as 1st dc), in corner space: [2dc, ch 2, 2dc], dc into next 7 stitches, in corner sp: [2dc, ch 2, 3dc], ch 1, in corner sp, [3dc, ch 2, 2dc], dc into next 7 stitches, in corner sp: [2dc, ch 2, 3dc], ch 1, sl st to join.
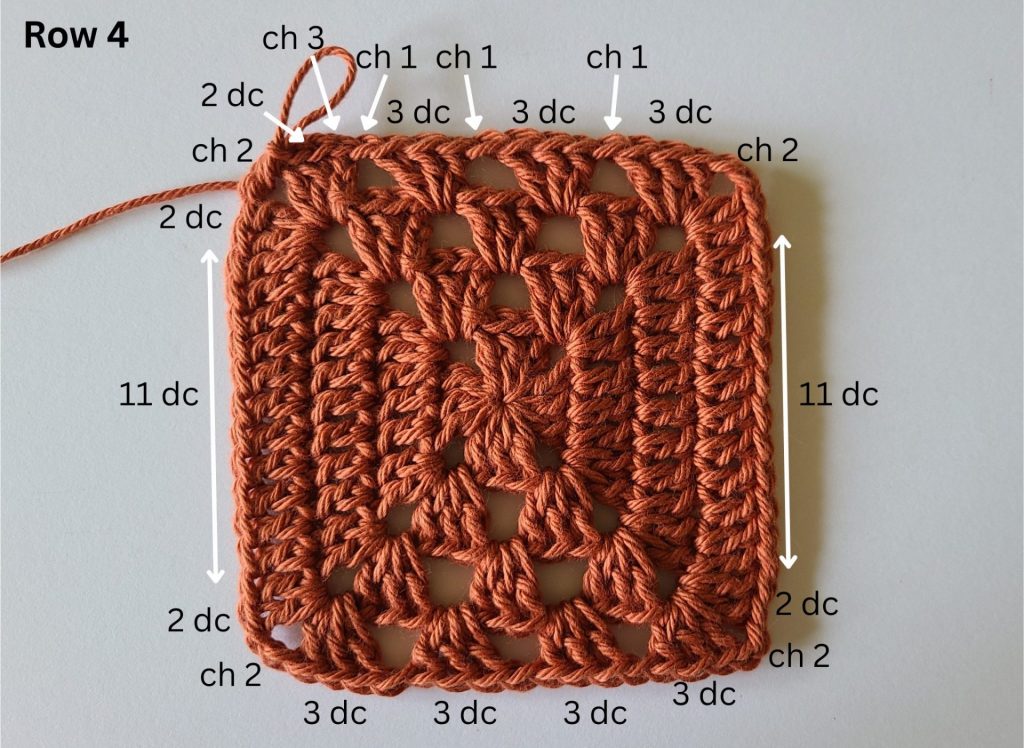
Row 4: Sl st 3x (to corner), ch 3 (counts as 1st dc), in corner space: [2dc, ch 2, 2dc], dc into next 11 stitches, in corner sp: [2dc, ch 2, 3dc], ch 1, in corner sp, [3dc, ch 2, 2dc], dc into next 11 stitches, in corner sp: [2dc, ch 2, 3dc], ch 1, sl st to join.
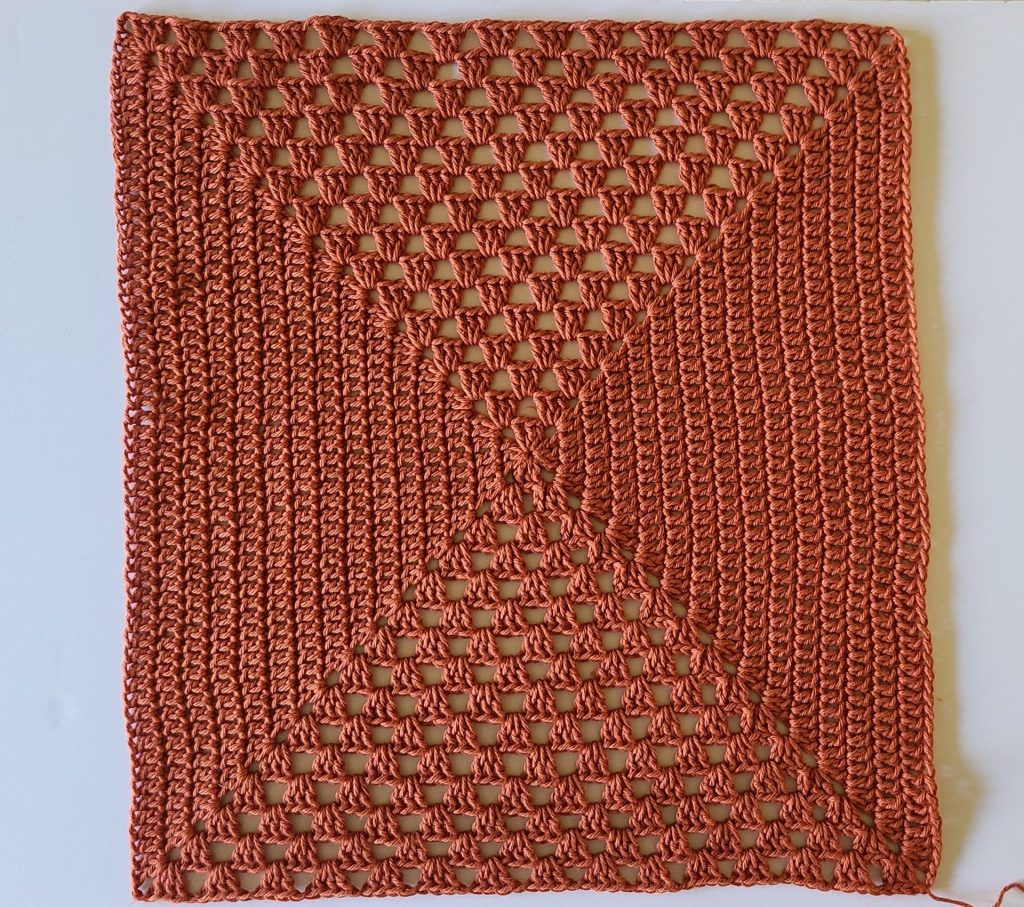
From row 5 to row 15: rep row 4
The Second Panel
Rep the same pattern as for the first panel.
The panel should be turned with the right side facing up
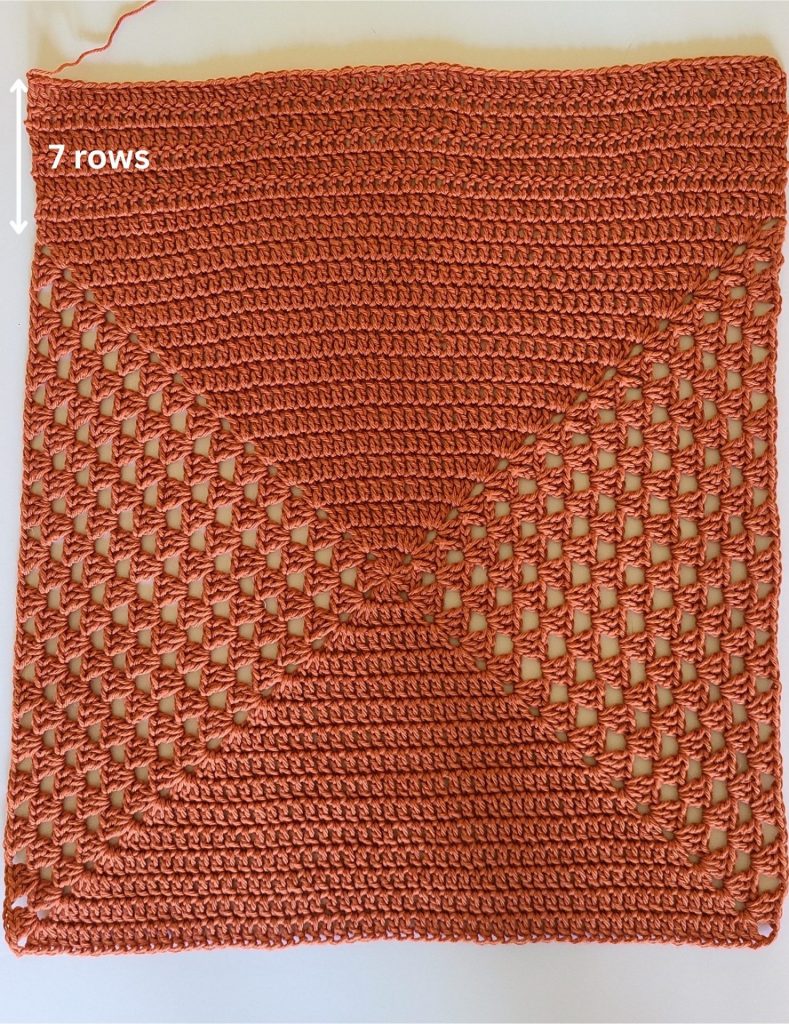
Row 1: attach yarn on the right top side corner, into the ch3 space. Ch3 (counts as 1st dc), dc in each st until the left corner, finishing with 1dc into the corner.
Row 2: Ch3 (counts as 1st dc), dc in each st until eor.
Row 3, 4, 5, 6, 7: rep row 2
Cut the yarn. Fasten off.
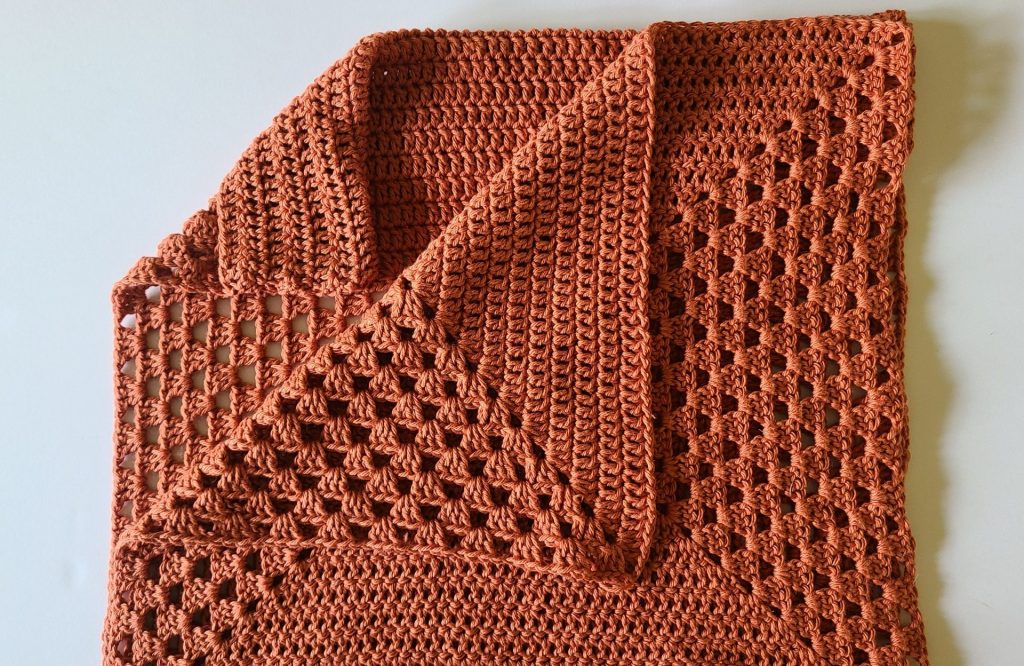
Granny Square Pillow Cover: Assembly
– The panel should be turned with the right side facing up
– Fold the 7 rows part and sew on the both sides
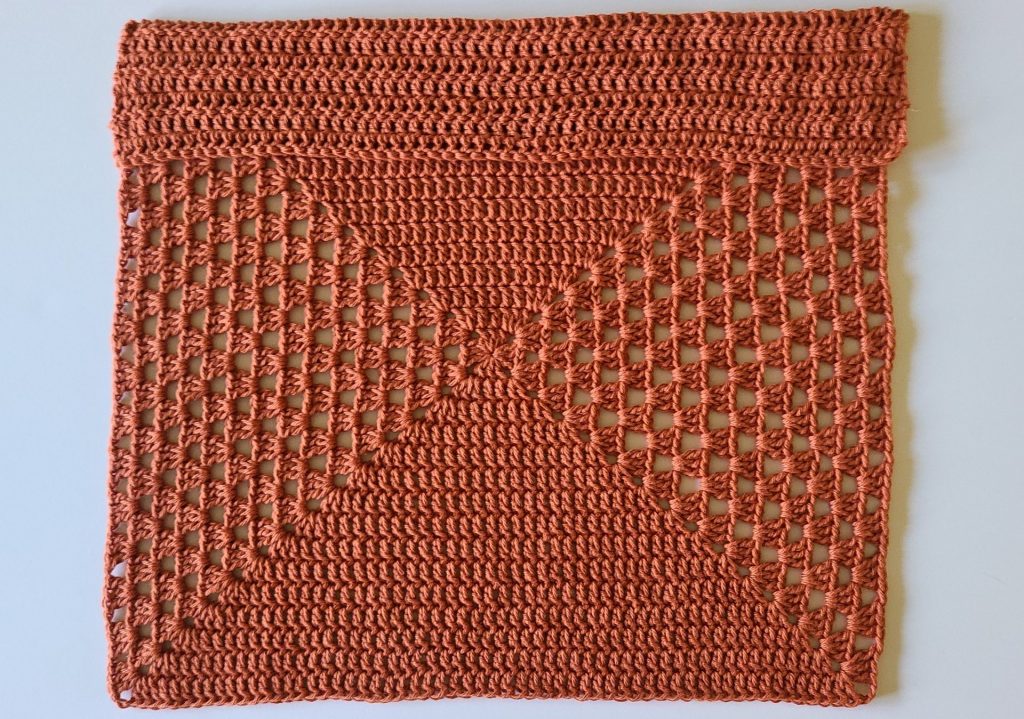
– Cut yarn. Wrap fabric around pillow. Fold excess down over pillow to form the envelope flap.
– Pin along edges to secure. Join yarn with a sl st to upper corner. Sl st down edge, be sure to go through the two layers, only to secure the envelope flap. Then fold the fabric on the opposite side and sl st down edge.
– I chose to create a visible seam by slip stitching on the inside. You can slip stitch all the way around the pillow or use the yarn needle and seam together sides.
– The panels should be turned with the right side facing up each other
Final Thoughts: Make Your Own Cozy Crochet Granny Square Pillow Cover
Creating your own crochet granny square pillow cover is not only a satisfying project, but it’s also a fantastic way to add a handmade touch to your home decor. Whether you’re a beginner or a seasoned crocheter, this easy simple pattern makes it possible for anyone to craft something both beautiful and functional.
The best part? You can mix and match colors, play with different yarn textures, and even adjust the size to suit your own style. It’s a fun, relaxing project that turns basic stitches into something truly special.
If you’ve followed along with this pattern, we’d love to see your finished work! Share your photos, leave a comment, or tag us on social media. And if you’re looking for more easy crochet patterns like this one, be sure to subscribe to the blog so you never miss a new project.
Happy crocheting! 🧶