
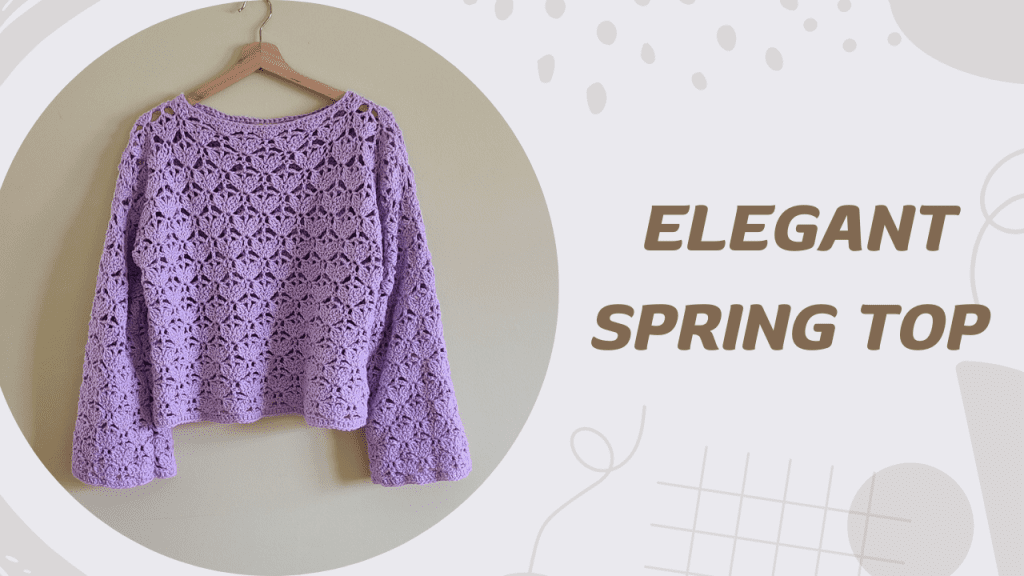
Crochet a stylish, elegant summer top with the Lavinia Crochet Lacy Top. This free pattern and step-by-step tutorial will guide you through every stitch. Additionally, it’s perfect for gifting or creating a handmade wardrobe staple.
About the Lavinia Crochet Lacy Top
Inspired by delicate vintage lace and modern feminine silhouettes, this crochet lacy top was designed to feel both romantic and wearable. The soft lavender shade enhances the airy texture, making it ideal for spring and summer, while still perfect for layering in cooler months.
This top is:
- Lightweight and breathable
- Feminine yet modern
- Perfect for casual or dressed-up styling
Materials
Essential Materials to Crochet Your Lacy Top
- I Love This Cotton Yarn Color: Orchid
- You will need approximately 760 (880, 930, 1010, 1070, 1120, 1200) yards of yarn for sizes XS (S, M, L, XL, XXL, 3XL).
- 5.0 mm crochet hook (or size needed for gauge) US size H-8
- Scissors
- Tapestry needle
- Measuring tape
Lavinia Crochet Lacy Top: Skill Level
Intermediate – Suitable for crocheters comfortable with lace stitches and garment construction.
You should be comfortable with:
- Chains
- Double crochet
- Working in rows
- Simple shaping
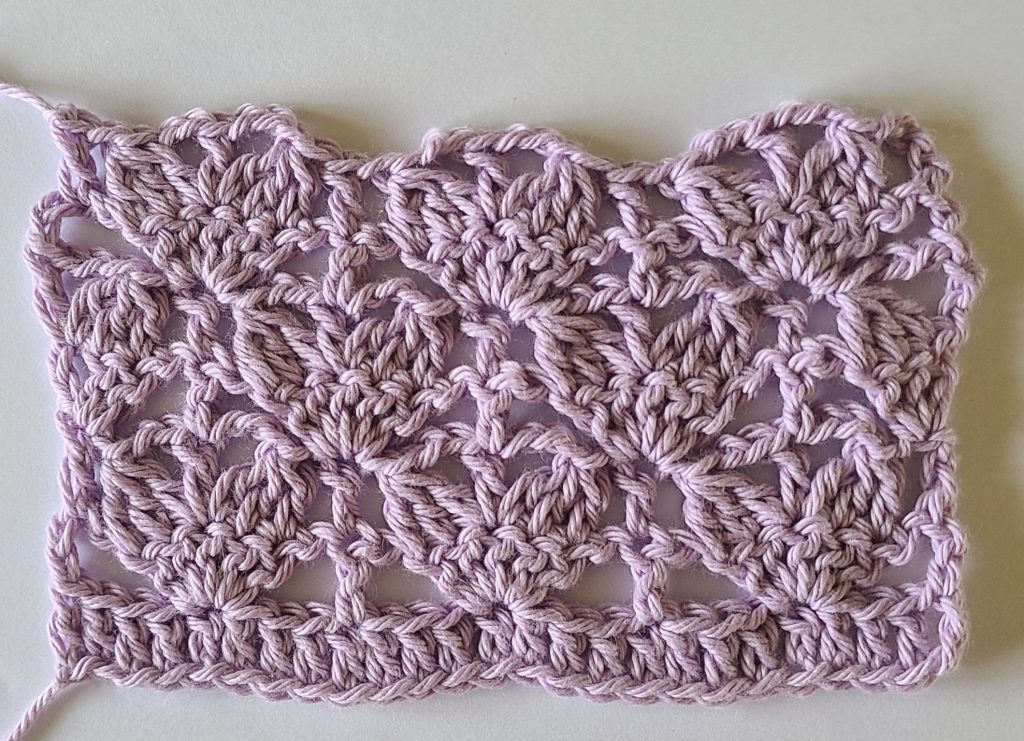
How to Crochet 3 dc tog Across 3 Stitches
The 3 dc tog stitch creates a cluster by combining 3 double crochets from three consecutive stitches into one stitch at the top.
Step-by-Step Instructions
- Insert hook into the first stitch
- Yarn over and pull up a loop (3 loops on hook)
- Yarn over (yo)
- Yarn over, pull through 2 loops (2 loops remain)
- Yarn over again
- Insert hook into the second stitch
- Yarn over, pull up a loop (4 loops on hook)
- Yarn over, pull through 2 loops (3 loops remain)
- Yarn over again
- Insert hook into the third stitch
- Yarn over, pull up a loop (5 loops on hook)
- Yarn over, pull through 2 loops (4 loops remain)
- Yarn over one last time
- Pull through all 4 loops on the hook
✅ You’ve now combined 3 stitches into 1 (3dc tog completed).
– The top of the cluster will count as one stitch, so adjust your stitch count accordingly.
– “3dctog, ch 1 to close the cluster. This ch-1 counts as a stitch.”
If you would like a printable PDF version, you can also find the full pattern on my Etsy shop.
Notes
- This pattern is written in US terms
- Take measurements of your body so you can chain accurate amount of stitches
- Ch 3 counts as 1st dc
- Multiple of 8 + 3 – see chart for size adjustments
- The stitch combination is 4 rows repeat (from Row 3 to 6). Although there’s a small difference between Row 2 and Row 6 even if they look the same. Between the shell of 5dc and dc is skip 3 only for Row 2. Between the shell of 5dc and dc is skip 4 for Row 6 and all the rows that you follow in the combination.
If you prefer visual learning, I’ve created a full step-by-step video tutorial to guide you through making the Lavinia Crochet Lacy Top from start to finish. In the video, I walk you through the stitch pattern, panel construction, sleeve shaping, and assembly so you can confidently follow along at your own pace. Whether you’re a confident beginner or an experienced crocheter, this tutorial makes the process simple and enjoyable.
Lavinia Crochet Lacy Top Sizing
Instructions are written for: XS–3XL
Always check your gauge before starting.
| Size Chest (in) | Length (in) | Width (in) |
| XS (28–30) | 17.2 | 16.4 |
| S (32–34) | 17.2 | 18.7 |
| M (36–38) | 18.5 | 21 |
| L (40–42) | 19.8 | 23.3 |
| XL (44–46) | 19.8 | 25,6 |
| XXL (48-50) | 21.1 | 27.9 |
| 3XL (52–54) | 21.1 | 27.9 |
Made-to-Measure Option
Although starting chain counts are provided for each size, this crochet lacy top can easily be made to measure for a custom fit while maintaining its relaxed ease. Create a starting chain that fits comfortably around your bust (or desired width) without stretching. Be sure the chain follows the stitch multiple used in the pattern. Once the correct length is reached, continue working the pattern as written. This option allows you to customize the fit while keeping the airy, relaxed look of the design.
Made-to-Measure: Step-by-Step for Beginners
Measure around your bust at the fullest point.
Add 2–4 inches (5–10 cm) for relaxed ease.
Chain stitches until the chain length matches your measurement, keeping the chain loose and even.
Adjust the number of chains to match the stitch multiple used in the pattern.
Begin Row 1 and follow the pattern as written once the chain fits comfortably without stretching.
Helpful Tip
Always check your gauge before starting, especially when working a crochet lacy top with relaxed ease. Even small differences in tension can change the fit.
Gauge
Gauge is important for achieving the correct fit.
Make a small swatch using the lace stitch pattern and adjust your hook size if needed.
4 inch x 4 inch = 14 dcs x 6 rows
Lavinia Crochet Lacy Top: Abbreviations
US terms used
**: Repeat instructions between asterisks as described
Ard: Around
Ch: Chain
Dc: Double crochet
Hdc: Half double crochet
Rep: Repeat
Sk: Skip
Sl st: Slip stitch
St: Stitch(es)
3dctog: 3 double crochets together
Lavinia Crochet Lacy Top: Starting Chain Sizes
| Size Chest (in) | Start chain for Back and Front Panel |
| XS (28–30) | 56 + 3 |
| S (32–34) | 64 + 3 |
| M (36–38) | 72 + 3 |
| L (40–42) | 80 + 3 |
| XL (44–46) | 88 + 3 |
| XXL (48-50) | 96 + 3 |
| 3XL (52–54) | 104 + 3 |
Pattern Instructions
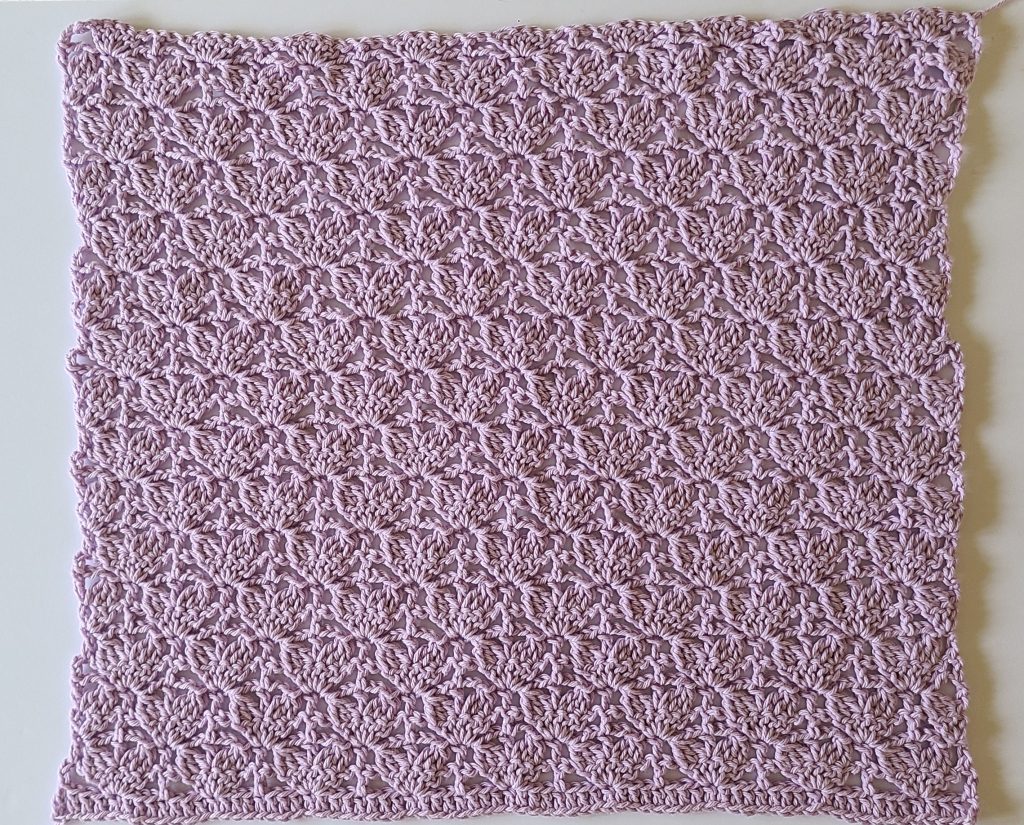
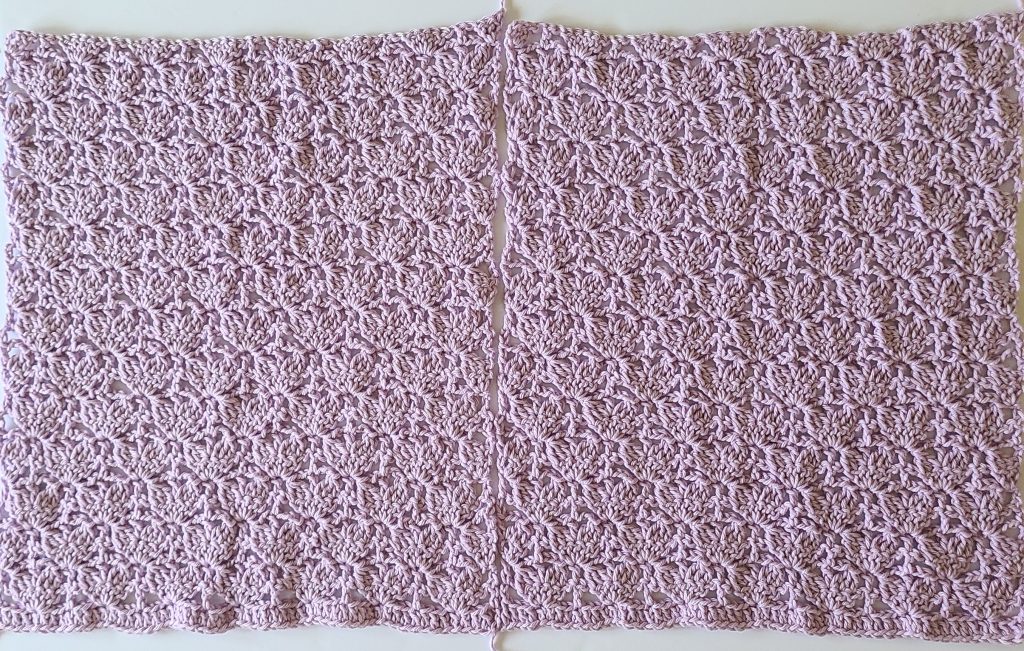
Back Panel
How to Crochet the Back Panel of the Lacy Top
Begin by crocheting the back panel using the lace stitch pattern. Work until the desired length is reached, checking fit as you go.
For size medium, refer to size chart for alternate starting chains
Chain 72+3 (multiple of 8+3)
Row 1: Dc in 4th ch from hook and in each ch across.
Row 2: Ch 4 (counts as dc + ch 1), turn.
*Sk next 3 sts, 5 dc in next st, ch 1, sk next 3 sts, dc in next st; rep from * across.
End by working dc in 3rd ch of beginning ch-3 from previous row.
Row 3: Ch 3 (counts as dc), turn.
*Sk next st, 3dctog over next 3 sts, ch 1 (cluster made), ch 2, dc in same st as last dc of 5-dc group from previous row (center dc of 5-dc group), ch 2, 3dctog over same st and next 2 sts, sk next st, dc in next st;
rep from * across.
End by sk next st, dc in 3rd ch of beginning ch-3 from previous row.
Row 4: Ch 3 (counts as dc), turn, 2 dc in first st, ch 1.
Sk next 4 sts, dc in next st, ch 1, sk next 4 sts, 5 dc in next st, ch 1, sk next 4 sts, dc in next st; *ch 1, sk next 4 sts, 5 dc in next st, ch 1, sk next 4 sts, dc in next st; rep from * across. End by sk next 4 sts, 3 dc in 3rd ch of beginning ch-3 from previous row.
Row 5: Ch 5 (counts as dc + ch 2), turn. 3dctog over first st and next 2 sts, ch 1 (cluster made). *Sk next st, dc in next st, sk next st, 3dctog over next 3 sts, ch 1 (cluster made), ch 2, dc in same st as center dc of 5-dc group from previous row, ch 2, 3dctog over same st and next 2 sts; rep from * across. End by sk next st, 3dctog over next 3 sts, ch 1 (cluster made), ch 2, dc in 3rd ch of beginning ch-3 from previous row.
Row 6: Ch 4 (counts as dc + ch 1), turn. Sk next 4 sts, 5 dc in next st, ch 1, sk next 4 sts, dc in next st; *ch 1, sk next 4 sts, 5 dc in next st, ch 1, sk next 4 sts, dc in next st; rep from * across. End by sk next 4 sts, dc in 3rd ch of beginning ch-3 from previous row.
Row 7: Rep Row 3.
Row 8: Rep Row 4.
Row 9: Rep Row 5.
Row 10: Rep Row 6.
Rows 7–10 form the 4-row repeat pattern.
Rep Rows 7–10 until you have:
28 rows total for Sizes XS and S
30 rows total for Size M
32 rows total for Sizes L and XL
34 rows total for Sizes 2XL and 3XL
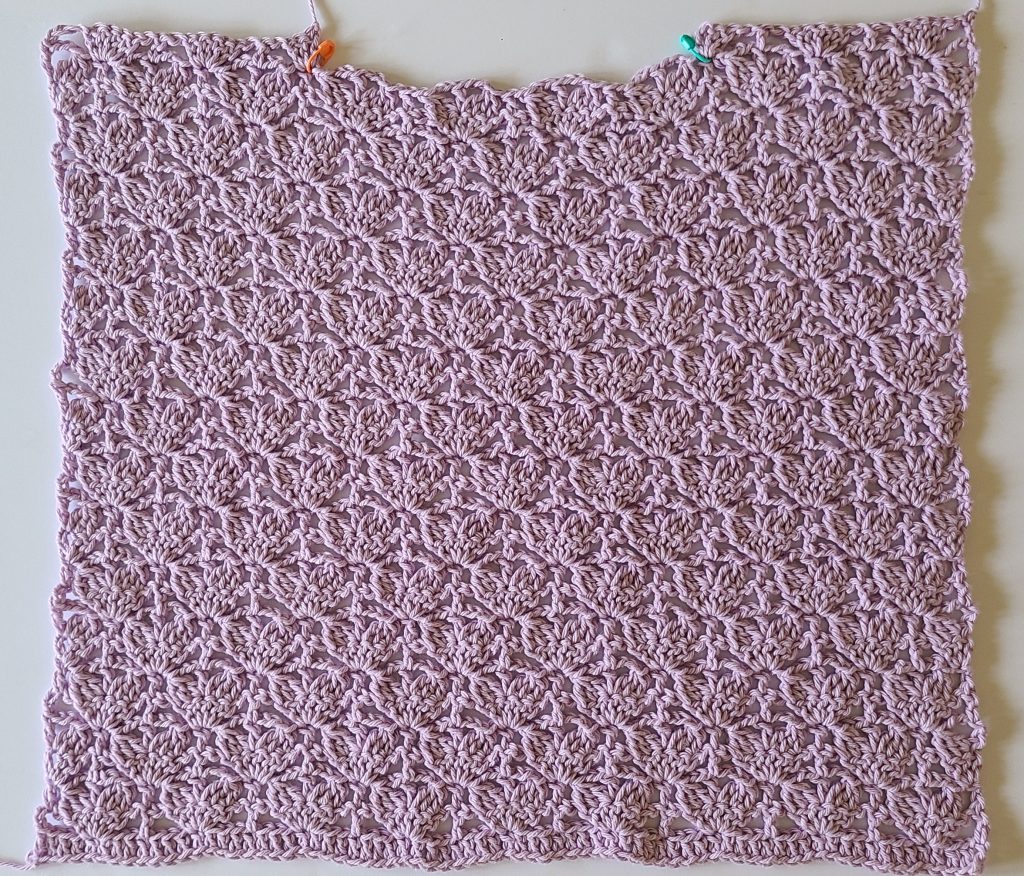
Front Panel
Crochet the Front Panel for a Beautiful Lacy Top
For size Medium, refer to the size chart for alternate starting chains.
Chain 72 + 3 (multiple of 8 + 3)
Rows 1–10: Work as described for the Back Panel (Rows 1–10).
Row Repeats and Last Row by Size:
Size XS (28 rows total)
- Rep the 4-row combination (Rows 3–6) until you have 27 rows total.
- Row 28 (Neckline Shaping):
Work in established pattern to create the neckline opening as follows:
Ch 3 (counts as dc), turn, 2 dc in first st, ch 1, sk next 4 sts, dc in next st, ch 1, sk next 4 sts, 5 dc in next st, ch 1, sk next 4 sts, dc in next st. Fasten off.
Sk next 39 sts, attach yarn in 16th st from opposite edge. Ch 4 (counts as dc + ch 1), sk next 4 sts, 5 dc in next st, ch 1, sk next 4 sts, dc in next st, ch 1, sk next 4 sts, 3 dc in last st. Fasten off.
Size S (28 rows total)
- Rep the 4-row combination (Rows 3–6) until you have 27 rows total.
- Row 28 (Neckline Shaping):
Work in established pattern as follows:
Ch 3 (counts as dc), turn, 2 dc in first st, ch 1, sk next 4 sts, dc in next st, ch 1, sk next 4 sts, 5 dc in next st, ch 1, sk next 4 sts, dc in next st, ch 1, sk next 4 sts, 3 dc in next st. Fasten off.
Sk next 39 sts, attach yarn in 20th st from opposite edge. Ch 3 (counts as dc), 2 dc in same st, ch 1, sk next 4 sts, dc in next st, ch 1, sk next 4 sts, 5 dc in next st, ch 1, sk next 4 sts, dc in next st, ch 1, sk next 4 sts, 3 dc in last st. Fasten off.
Size M (30 rows total)
- Rep the 4-row combination (Rows 3–6) until you have 29 rows total.
- Row 30 (Neckline Shaping):
Work in established pattern as follows:
Ch 4 (counts as dc + ch 1), turn, sk next 4 sts, 5 dc in next st, ch 1, sk next 4 sts, dc in next st, ch 1, sk next 4 sts, 5 dc in next st, ch 1, sk next 4 sts, dc in next st, ch 1, sk next 4 sts, 3 dc in next st. Fasten off.
Sk next 39 sts, attach yarn in 25th st from opposite edge. Ch 3 (counts as dc), 2 dc in same st, ch 1, sk next 4 sts, dc in next st, ch 1, sk next 4 sts, 5 dc in next st, ch 1, sk next 4 sts, dc in next st, ch 1, sk next 4 sts, 5 dc in next st, ch 1, sk next 4 sts, dc in last st. Fasten off.
Size L (32 rows total)
- Rep the 4-row combination (Rows 3–6) until you have 31 rows total.
- Row 32 (Neckline Shaping):
Work in established pattern as follows:
Ch 3 (counts as dc), turn, 2 dc in first st, ch 1, sk next 4 sts, dc in next st, ch 1, sk next 4 sts, 5 dc in next st, ch 1, sk next 4 sts, dc in next st, ch 1, sk next 4 sts, 5 dc in next st, ch 1, sk next 4 sts, dc in next st, ch 1, sk next 4 sts, 3 dc in next st. Fasten off.
Sk next 39 sts, attach yarn in 31st st from opposite edge. Ch 3 (counts as dc), 2 dc in same st, ch 1, sk next 4 sts, dc in next st, ch 1, sk next 4 sts, 5 dc in next st, ch 1, sk next 4 sts, dc in next st, ch 1, sk next 4 sts, 5 dc in next st, ch 1, sk next 4 sts, 3 dc in last st. Fasten off.
Size XL (32 rows total)
- Rep the 4-row combination (Rows 3–6) until you have 31 rows total.
- Row 32 (Neckline Shaping):
Work in established pattern as follows:
Ch 3 (counts as dc), turn, 2 dc in first st, ch 1, sk next 4 sts, dc in next st, ch 1, sk next 4 sts, 5 dc in next st, ch 1, sk next 4 sts, dc in next st, ch 1, sk next 4 sts, 5 dc in next st, ch 1, sk next 4 sts, dc in next st, ch 1, sk next 4 sts, 3 dc in next st. Fasten off.
Sk next 47 sts, attach yarn in 31st st from opposite edge. Ch 3 (counts as dc), 2 dc in same st, ch 1, sk next 4 sts, dc in next st, ch 1, sk next 4 sts, 5 dc in next st, ch 1, sk next 4 sts, dc in next st, ch 1, sk next 4 sts, 5 dc in next st, ch 1, sk next 4 sts, 3 dc in last st. Fasten off.
Size XXL & 3XL (34 rows total)
- Rep the 4-row combination (Rows 3–6) until you have 33 rows total.
- Row 34 (Neckline Shaping):
Work in established pattern as follows:
Ch 4 (counts as dc + ch 1), turn, sk next 4 sts, 5 dc in next st, ch 1, sk next 4 sts, dc in next st, ch 1, sk next 4 sts, 5 dc in next st, ch 1, sk next 4 sts, dc in next st, ch 1, sk next 4 sts, 5 dc in next st, ch 1, sk next 4 sts, dc in next st. Fasten off.
Sk next 49 sts, attach yarn in 36th st from opposite edge. Ch 4 (counts as dc + ch 1), sk next 4 sts, 5 dc in next st, ch 1, sk next 4 sts, dc in next st, ch 1, sk next 4 sts, 5 dc in next st, ch 1, sk next 4 sts, dc in next st, ch 1, sk next 4 sts, 5 dc in next st, ch 1, sk next 4 sts, dc in last st. Fasten off.
Sleeves
Crochet the Sleeves for a Stylish Lacy Top
Starting Chain by Size:
- Size XS & S: Chain 48 + 3
- Size M & L: Chain 56 + 3
- Size XL, XXL & 3XL: Chain 64 + 3
Work the stitch pattern established for the panels.
Row Repeats / Sleeve Length by Size:
- Size XS & S: Work until 26 rows total.
- Size M, L & XL: Work until 28 rows total.
- Size XXL & 3XL: Work until 30 rows total.
Assembly
Step-by-Step Assembly for Your Crochet Lacy Top
Shoulders
Place the front and back panels right sides together. Align the shoulder edges and join with slip stitch across each shoulder.
Sleeves
Next, position the sleeves at the armhole openings. Align the top center of the sleeve with the shoulder seam. Then, join with slip stitch along the top of each sleeve.
Side and Underarm Seams
Fold the garment so that the front and back panels are aligned. Finally, slip stitch along the side seams and underarm, continuing seamlessly along the sleeve from the armpit to the cuff.
Finishing
Weave in all ends and turn the garment right side out. Check that all seams lie flat and that the front neckline straps are aligned.
Lavinia Crochet Lacy Top: Neck line border
Attach yarn in any stitch.
Row 1: Ch 2, ch hdc in each st around, sl st to the first ch2 to join
Row 2: Ch 1, sl st in each st, sl st to the ch1 to join
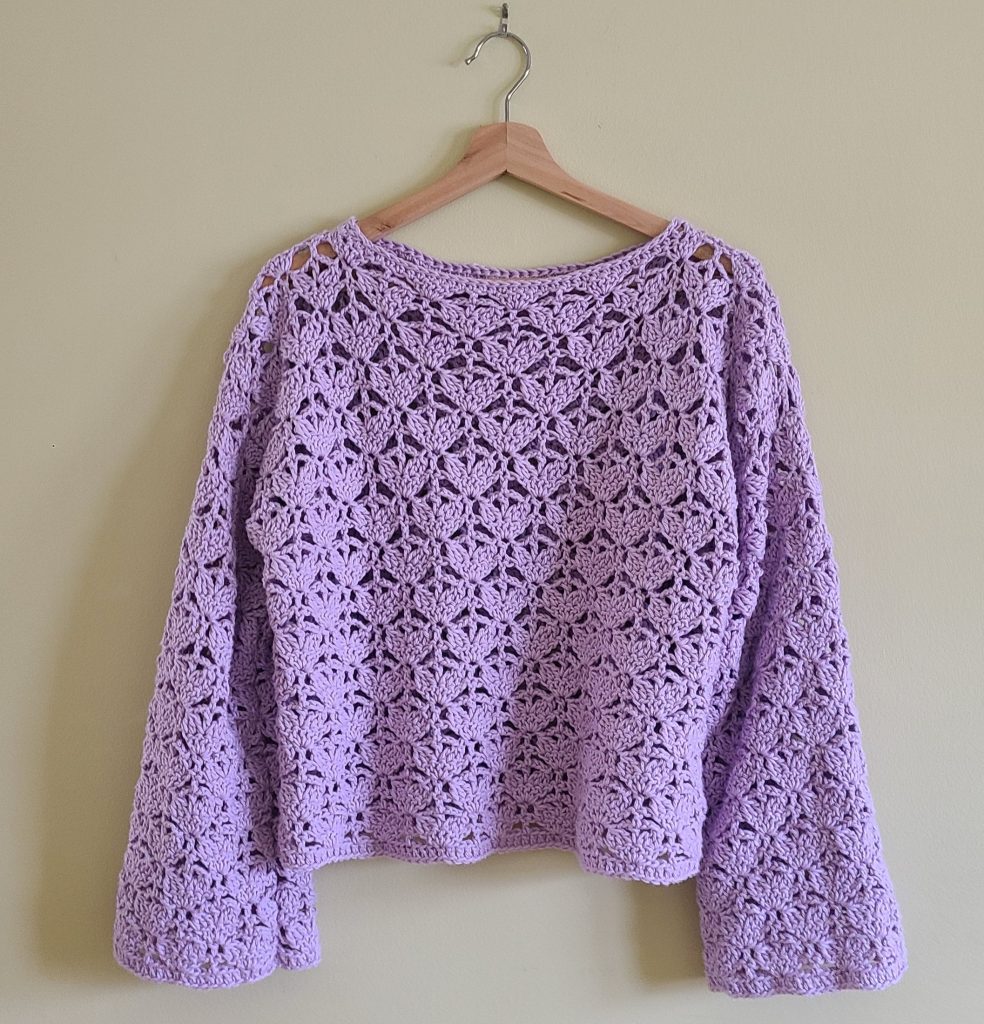
How to Style the Lavinia Crochet Lacy Top
This lavender crochet sweater pairs beautifully with:
- High-waisted jeans
- Flowy skirts
- Neutral trousers
- Layered over a camisole
It works perfectly as a spring crochet top or a lightweight summer crochet blouse.
Why You’ll Love This Crochet Lacy Top
- Elegant lace texture
- Trendy flare sleeves
- Breathable and lightweight
- Perfect handmade gift
- Easy to customize length
Frequently Asked Questions
Is this crochet lacy top beginner friendly?
This pattern is best suited for intermediate crocheters due to the lace detailing.
Can I make the Lavinia Crochet Lacy Top longer?
Yes! Simply add extra rows before shaping.
What yarn works best?
Lightweight cotton or cotton-blend yarn works best for structure and breathability.
Final Thoughts
The Lavinia Crochet Lacy Top is a timeless handmade piece that blends romantic lace texture with modern styling. Whether you’re creating it for yourself or as a gift, this crochet lacy top is a beautiful addition to any handmade wardrobe.
If you make this lavender crochet top, share your version and tag your creations!
If you love airy lace designs, you’ll also adore the Galena Lacy Top free pattern here on the blog. The Galena design features a similarly delicate texture with a flattering, wearable silhouette that’s perfect for warm weather layering. Be sure to check out the Galena Lacy Top free pattern for another beautiful lace crochet project to add to your handmade wardrobe.