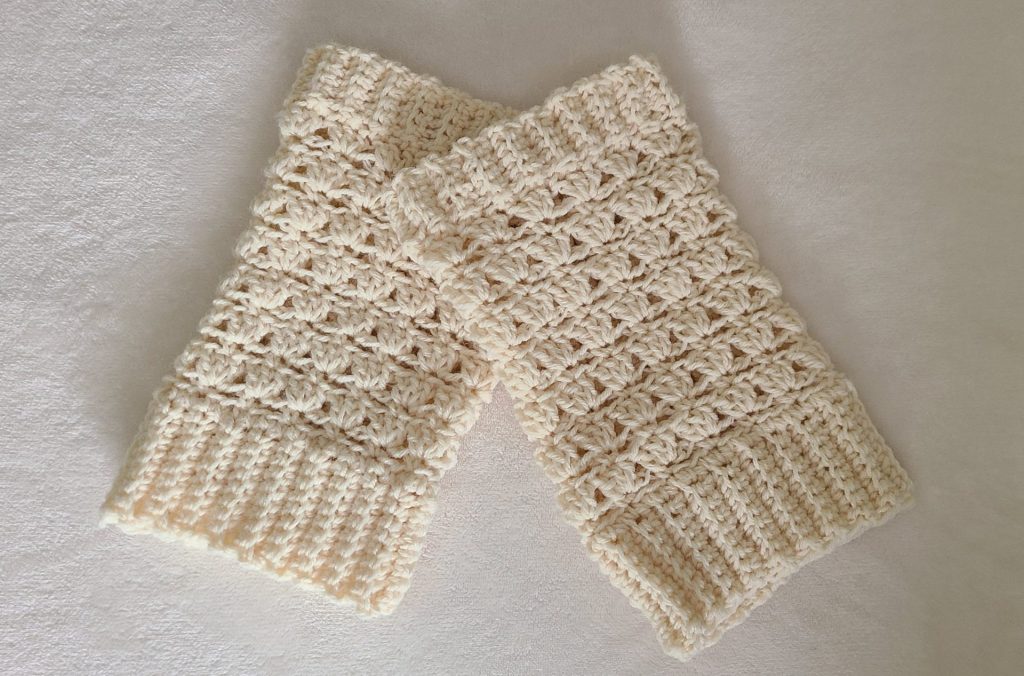
Looking for a fun and easy project to keep your legs warm and stylish? Crochet leg warmers are perfect for beginners who want to make something cozy without complicated stitches. With just a few basic techniques, you can create a pair that fits perfectly and adds a handmade touch to any outfit. In this post, we’ll guide you step by step so you can make your own crochet leg warmers quickly, easily, and with plenty of style.
What makes this pattern truly special is its blend of comfort and simplicity. You can tailor the length, fit, and color to match your personal style, and the repetitive stitch pattern makes it a relaxing, TV-friendly project. Whether you’re using up leftover yarn or treating yourself to a new skein, they stitch up fast and look great with boots, leggings, or lounge wear. Let’s grab a hook and get started!
Why You’ll Love These Crochet Leg Warmers
What makes these crochet leg warmers so lovable is their perfect blend of comfort, style, and practicality. Whether you’re layering up for chilly mornings or adding a handmade touch to your favorite boots, they’re the kind of accessory you’ll reach for again and again. Because this crochet leg warmers free pattern is easy to customize, you can adjust the length, width, and colors to match your personal style—go bold with vibrant stripes or keep it classic with a neutral shade.
They’re also incredibly quick to make, making them a satisfying project for beginners and seasoned crocheters alike. Plus, they’re great stash-busters, letting you use up leftover yarn in a fun and functional way. Warm, cute, and endlessly adaptable—what’s not to love?
If you love the simplicity and style of these crochet leg warmers, you’ll be happy to know that the same stitches are used in my crochet fingerless gloves pattern. This means you can practice your favorite techniques while creating another cozy accessory for your wardrobe. Both projects are beginner-friendly, use the same basic stitches, and are perfect for gifting or keeping for yourself. By trying both, you’ll quickly gain confidence in working with these versatile stitches and see just how easy it is to make stylish handmade pieces.
Notes
This pattern is written in US terms.
Ch 3 counts as 1st dc.
Materials
– Brand® Wool-Ease® Solids & Heathers Yarn, Weight: Medium (4), Contents: 80% Acrylic, 20% Wool, Skein Weight: 3 oz / 85 g, Yardage: 197 yd / 180 m
– Hook: 5 mm (H/8)
– Scissors
– Yarn needle
– Stitch marker (optional)
Size
Adult – fits most
– (You can easily adjust width by adding or reducing stitches in the ribbing.)
Abbreviations
– Ch: chain
– Sc: Single crochet
– Eor: end of row
– Rep: repeat
– Sl st: slip stitch
– St: stitch(es)
– Dc: Double crochet
– 2sctog: two single crochet together
– BLO: back loop only
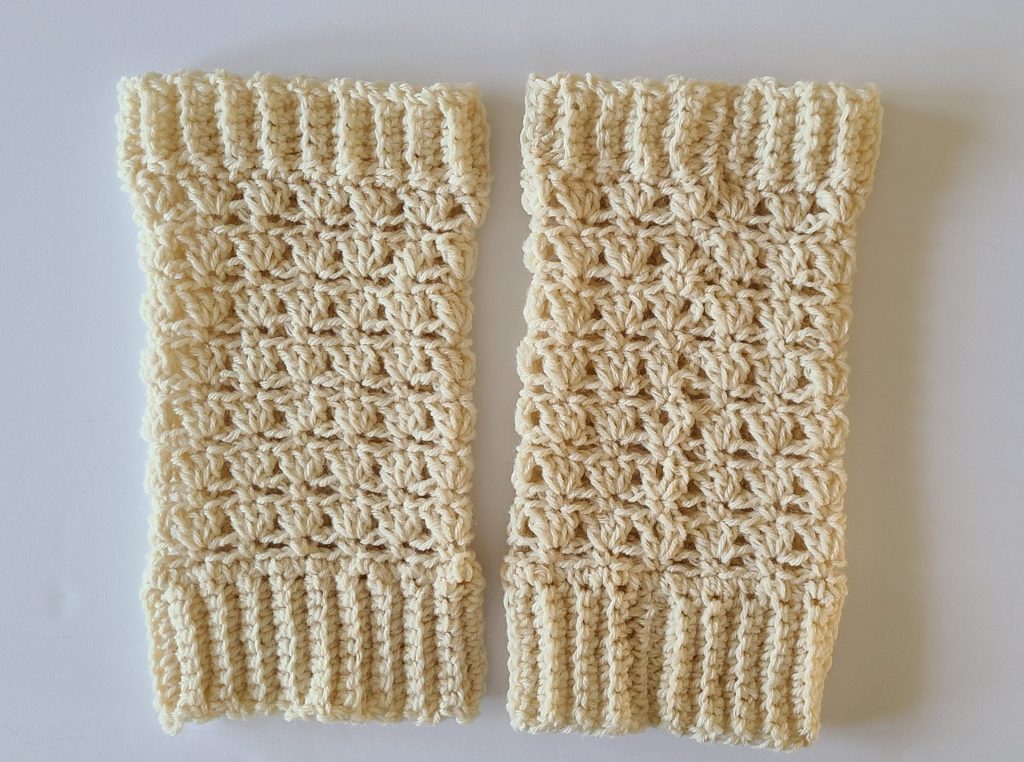
Crochet Leg Warmers: Sizing Information
Height: 11 inches
Width: 6 inches
Gauge
– 13 sc x 9 rows (4×4 inch square)
Crochet Leg Warmers: Pattern (make 2)
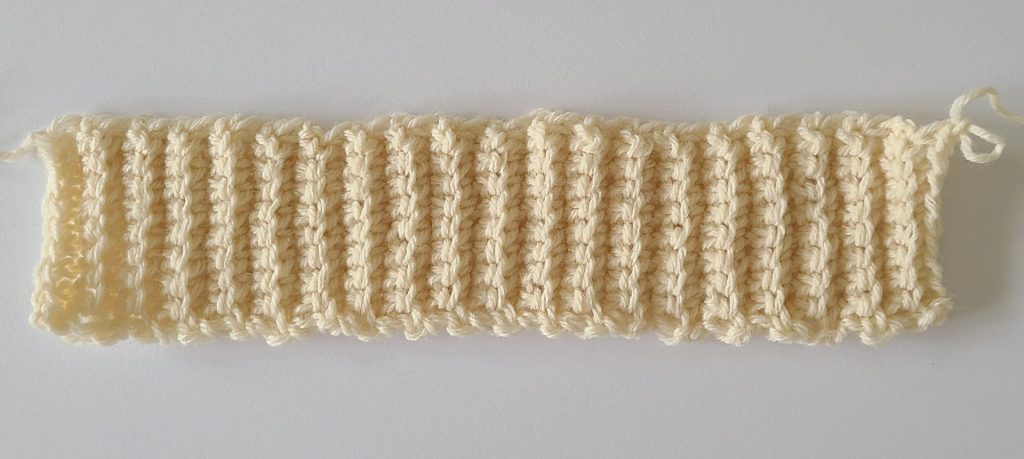
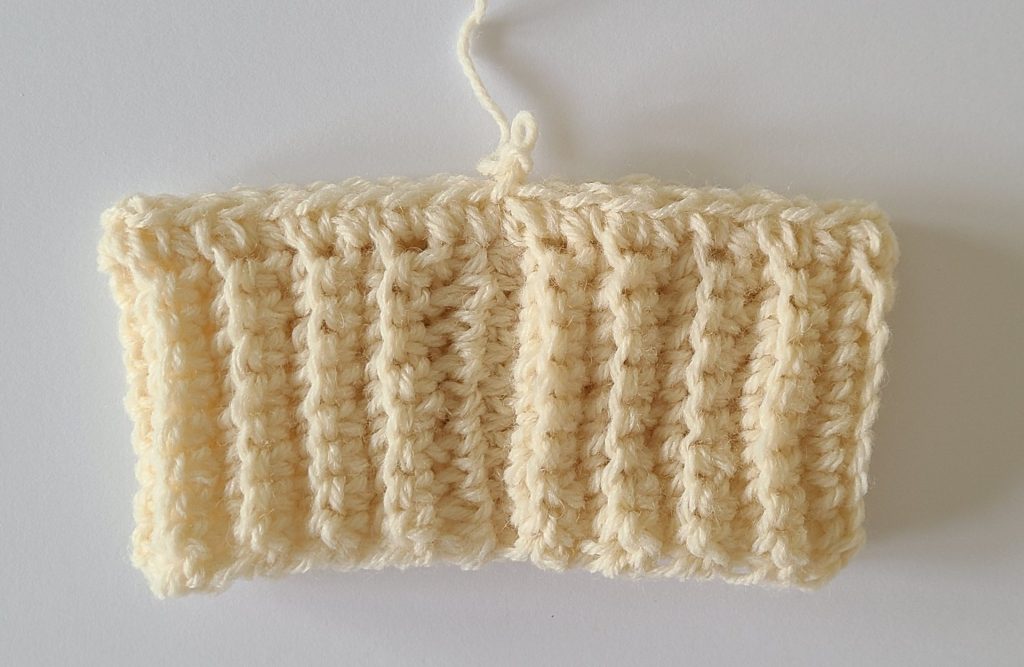
Ribbing (Bottom)
Chain 10
Row 1: Sc in the 2nd st, 1sc in next 8 st.
Row 2: Ch 1, turn, sc in BLO to eor
Row 3 to Row 39: Rep Row 2.
Make as many rows you need for your wrist measurements. It has to be a multiple of 3 number.
Size Adjustments:
– Small: 36 rows
– Medium/Large: 39 rows
– XL/XXL: 42 rows
– 3XL: 45 rows
Crochet Leg Warmers: Body Texture Section
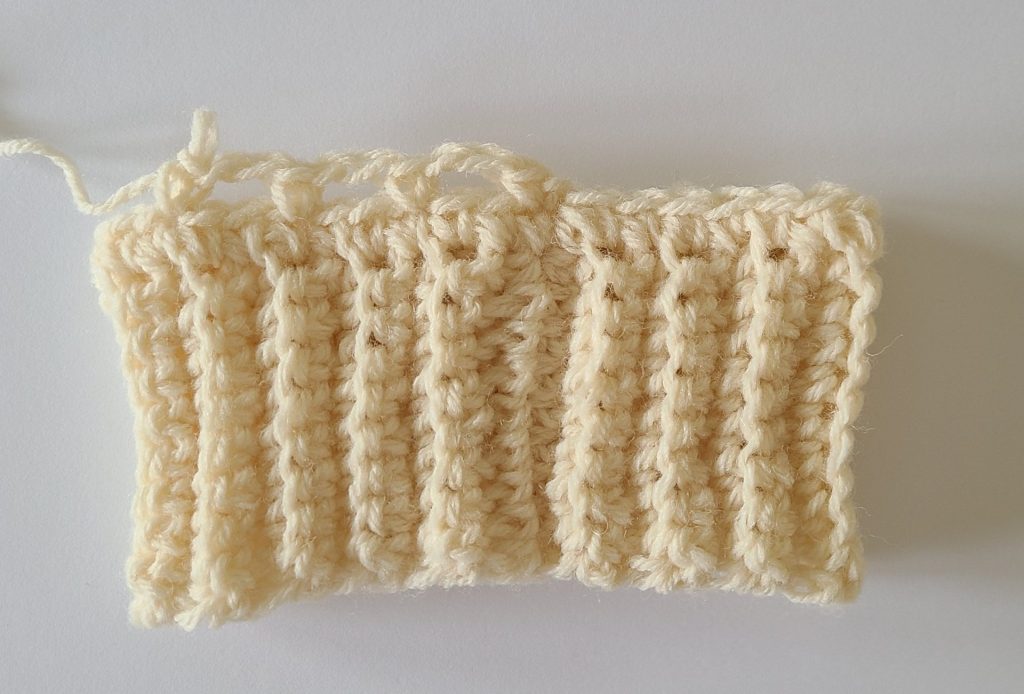
To start the body section fold the ribbing with the wrong side facing up and sl st.
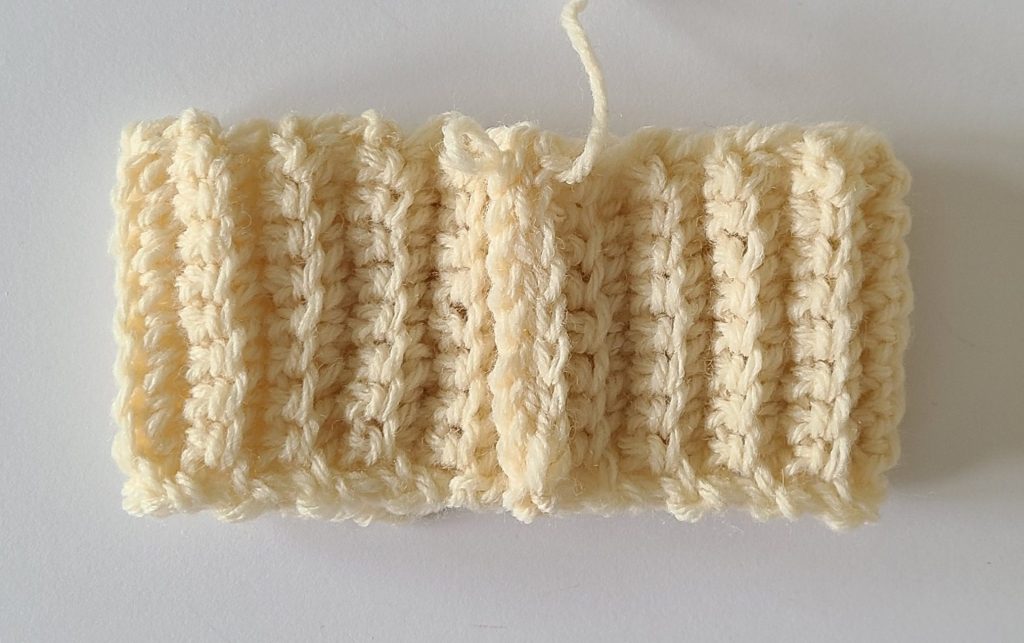
Row 1: Ch 1, 1sc in each st around the edge of the ribbing.
Number of stitches for each size:
– Small: 36
– Medium: 39
– Large: 39
– XL: 42
– XXL: 42
– XXXL: 45
Row 2: Ch 1, sc in same st, ch 2, sk 2, 1sc in next st, rep until eor, sl st to the first sc.
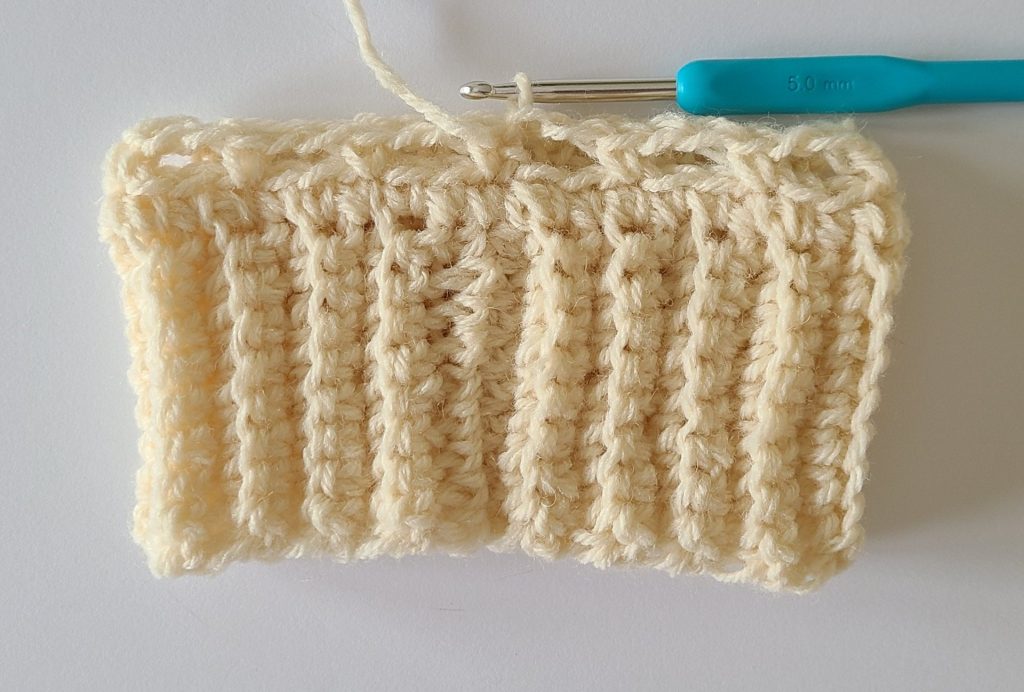
Row 3: Ch 3, dc in same st, sk2, 3dc in next st, rep until eor, dc in the first st, sl st to the 3rd ch from the first ch3.
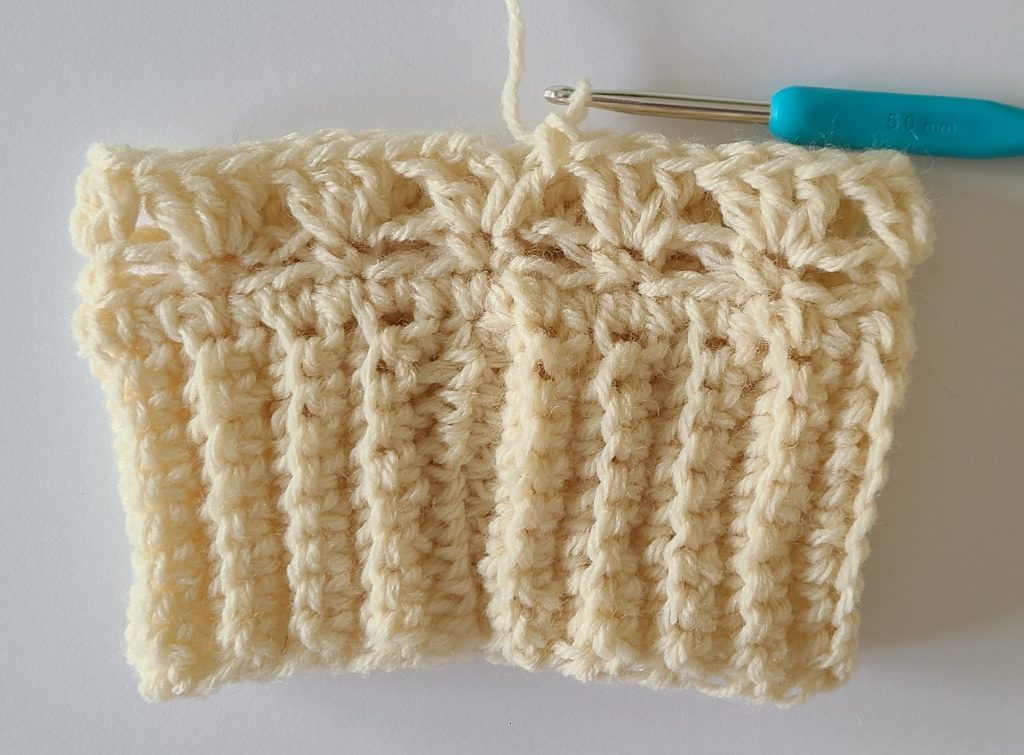
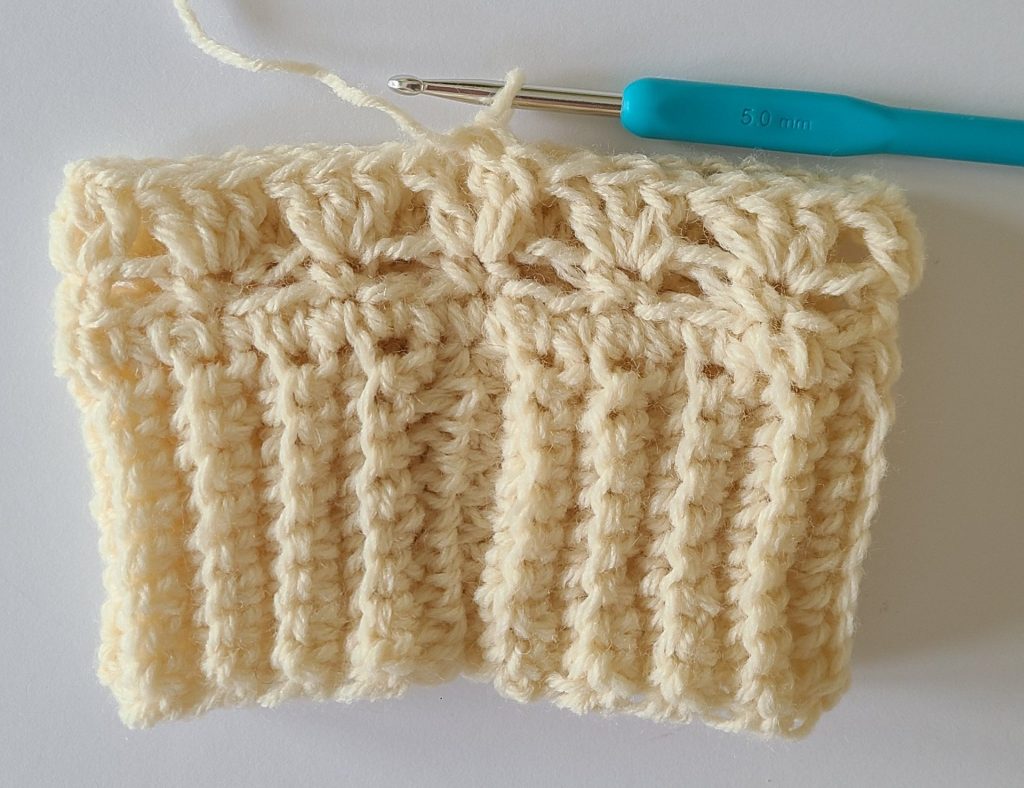
Row 4: Rep Row 2
Row 5: Rep Row 3
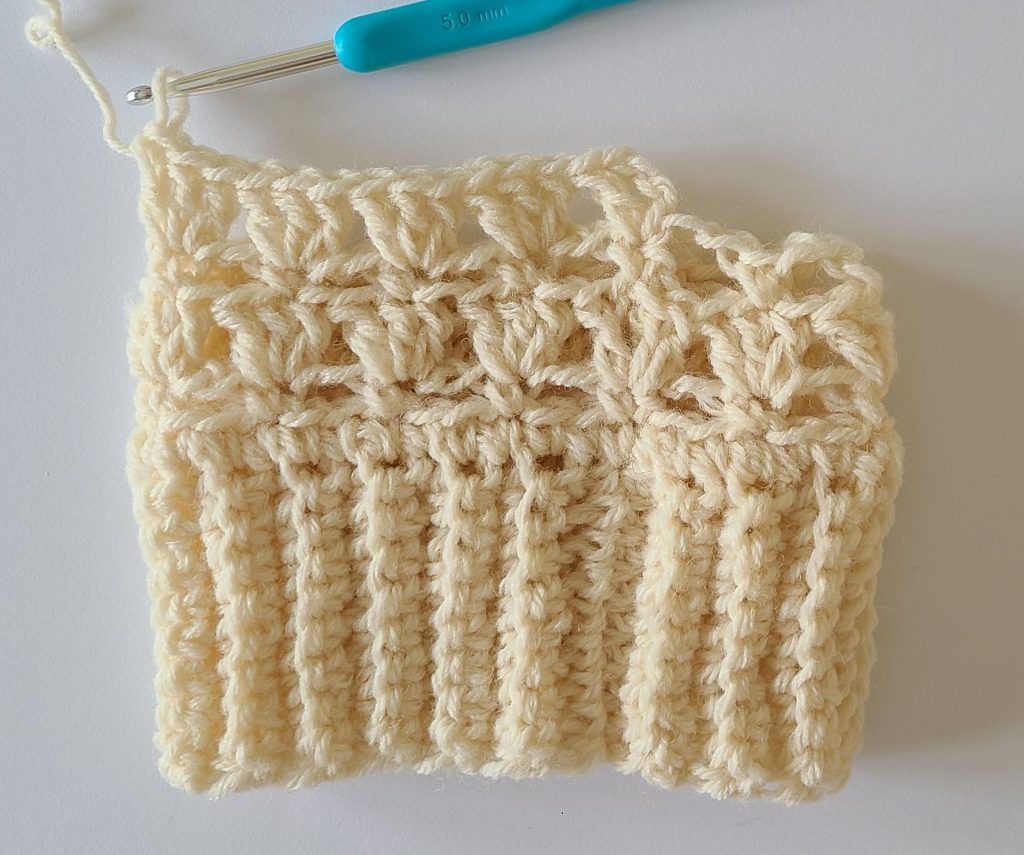


Row 6, 8, 10, 12, 14: Rep Row 2;
Rows 7, 9, 11, 13, 15: Rep Row 3
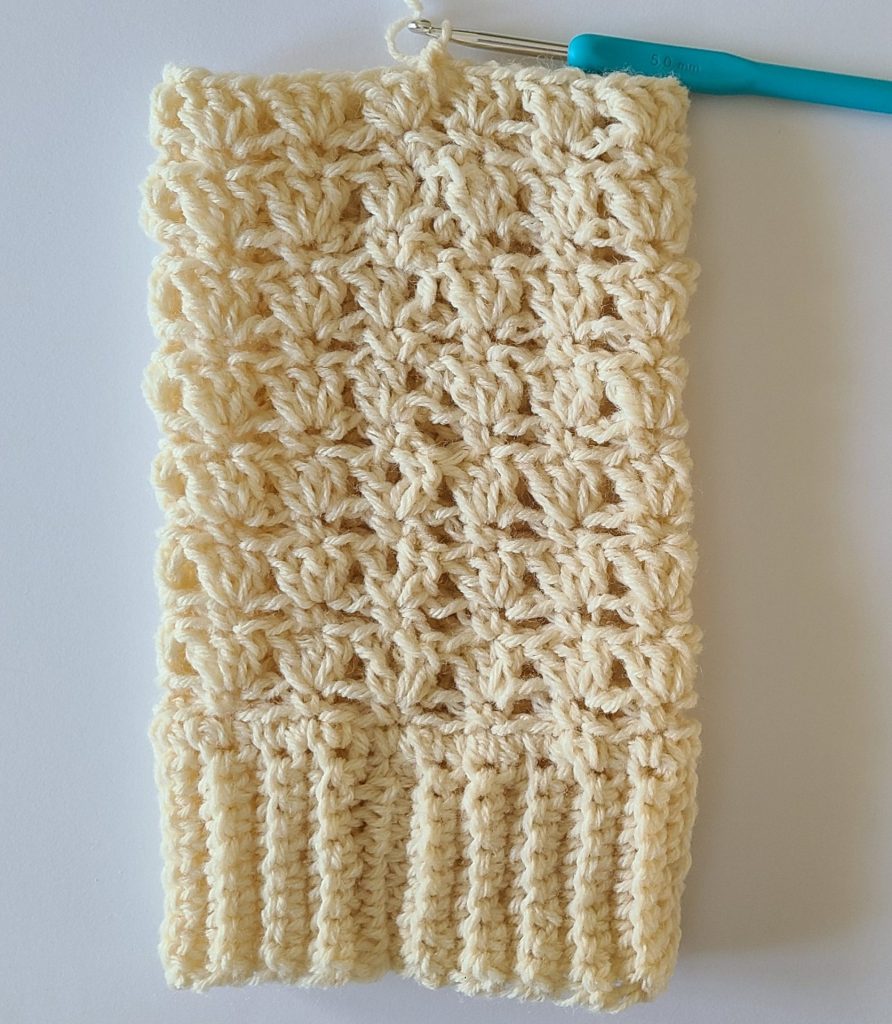
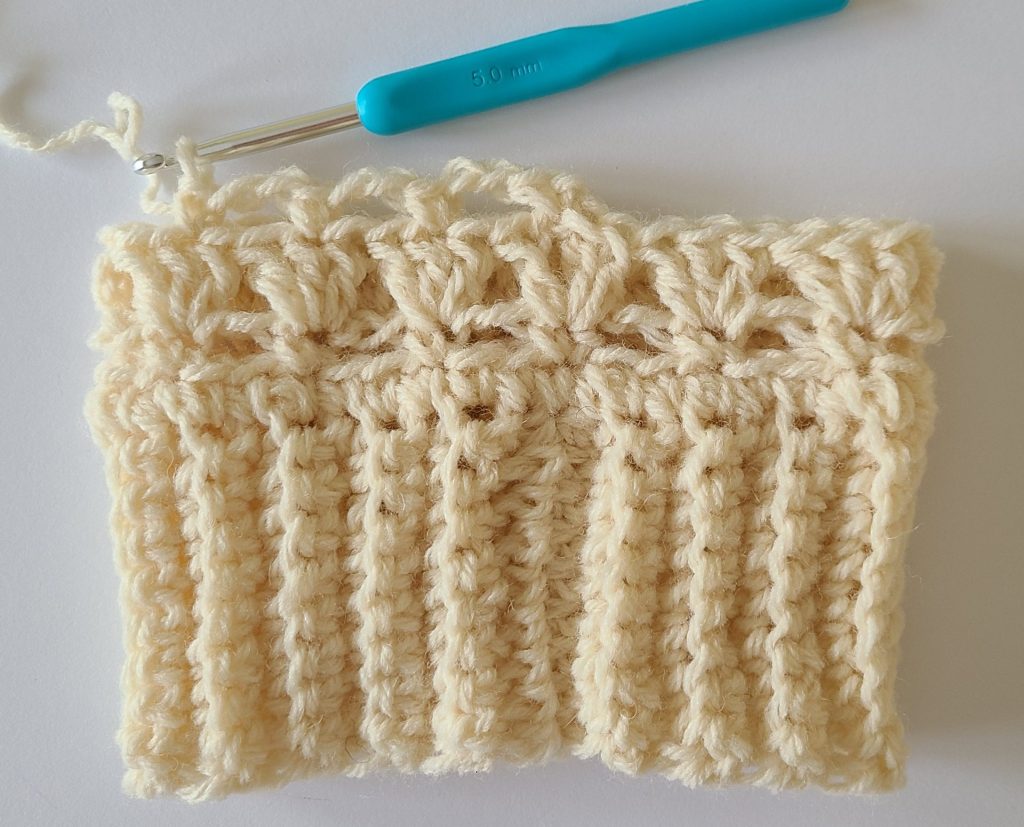
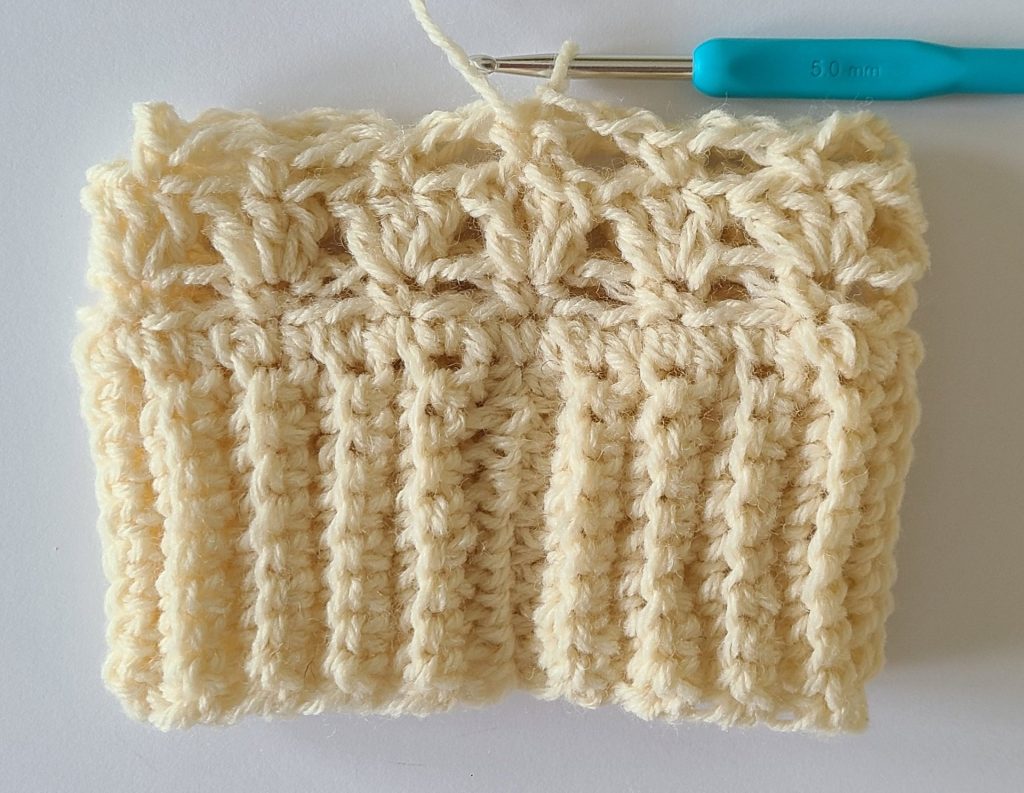
To adjust the length, simply continue working the BODY rows until your desired length is reached. Don’t forget that the Top Ribbing will also add a little bit of length!
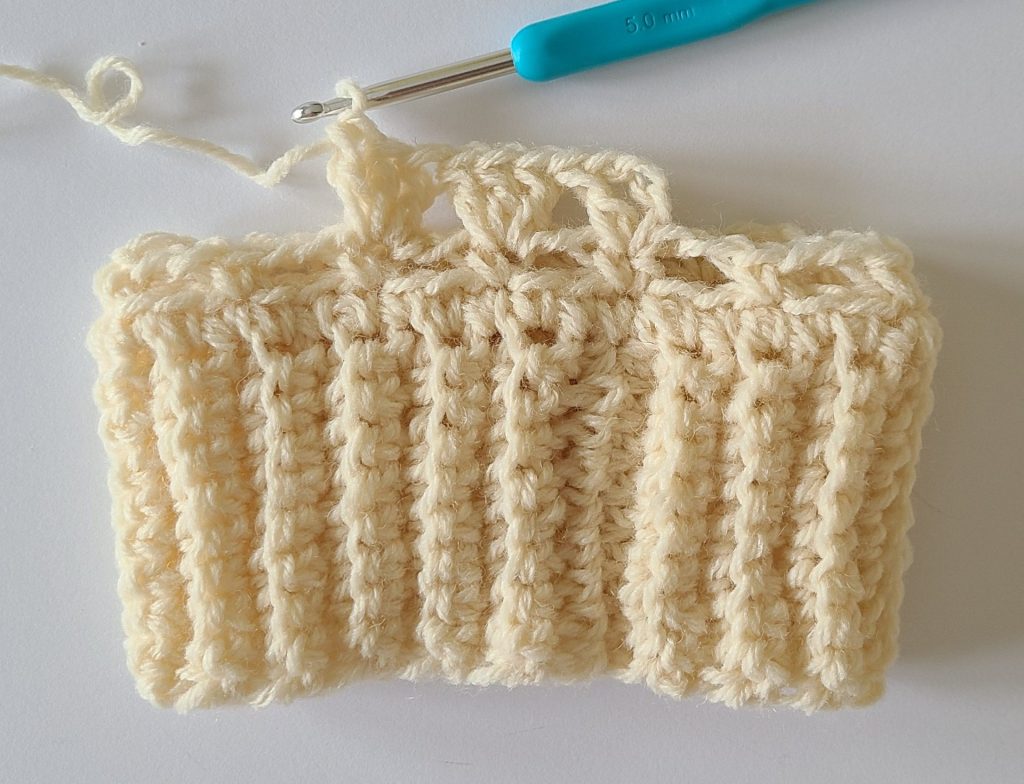
Top ribbing
Work the ribbing perpendicular to the leg warmer, joining to the final BODY row as you go. At the end of each row, the second sl st is in place of a turning ch -1.
Ch 6
Row 1: Sc in the 2nd st, 1sc in next 4 st. sl st to the next st from teh body
Row 2: Sl st to the next st, turn, sc in BLO to eor.
Row 3 to Row 39: Rep Row 2.

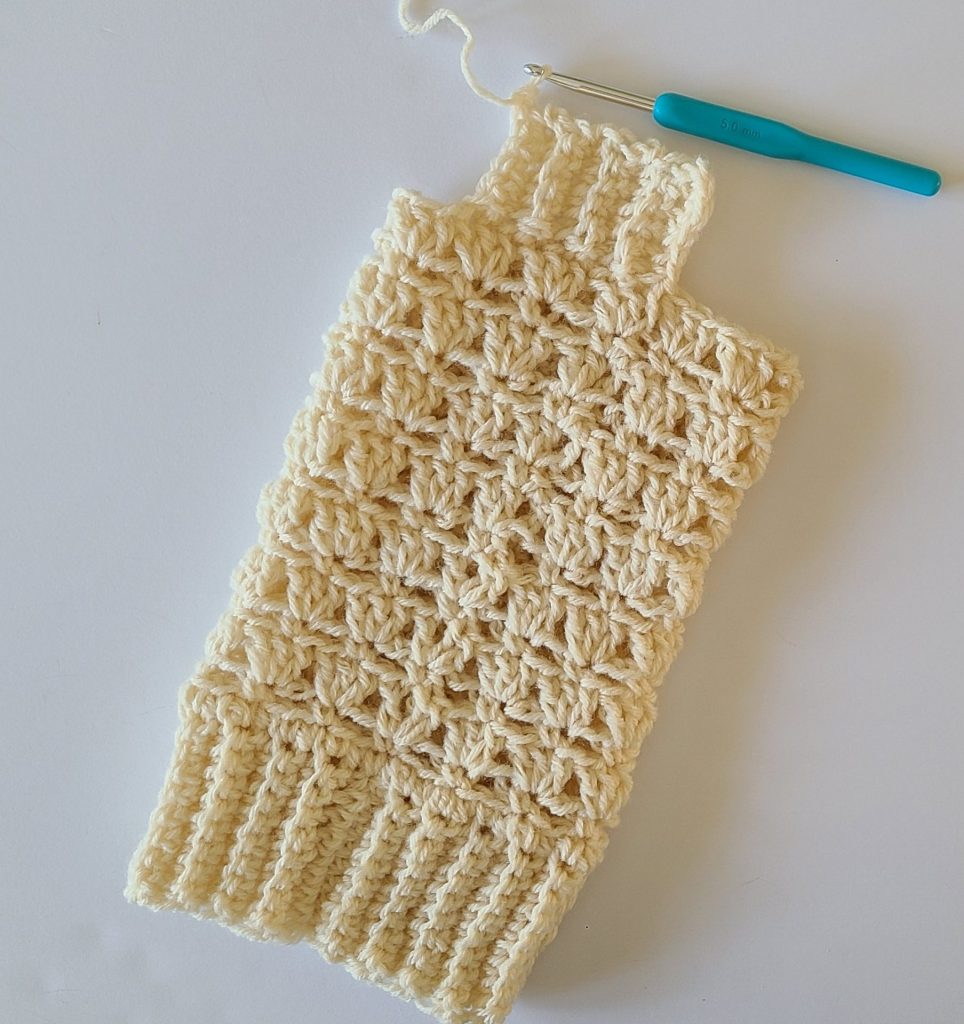
Cut yarn and fasten off. Weaving in ends.