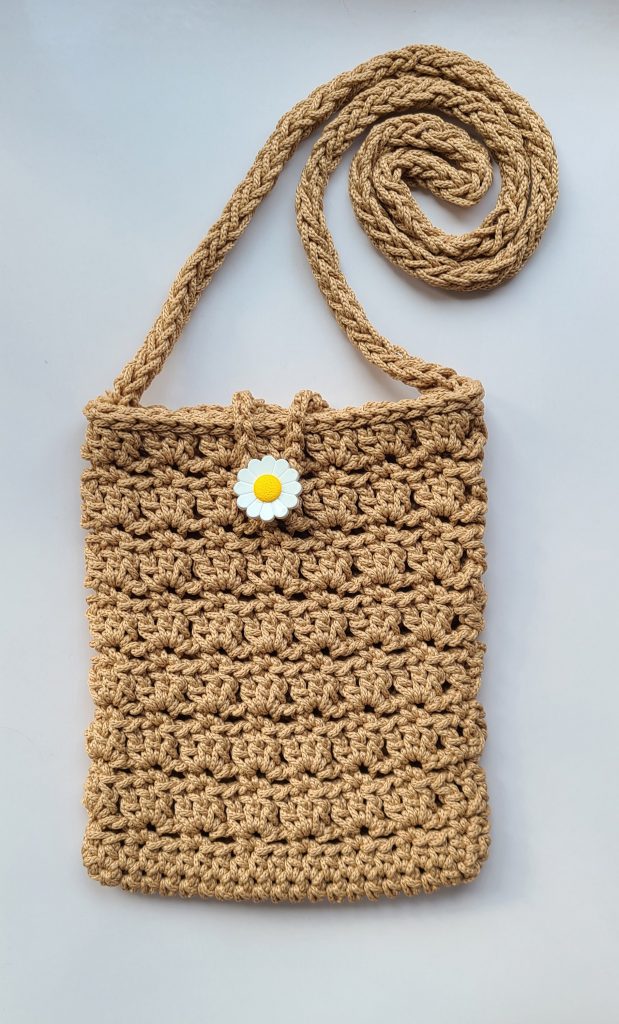
There’s something effortlessly chic about a crochet crossbody bag. With its intricate patterns and soft textures, it instantly elevates any outfit while keeping your essentials close at hand. Perfect for casual days out or stylish weekend adventures, this bag combines craftsmanship and convenience in one versatile accessory.
Crochet Crossbody Bag Design Overview
This crochet crossbody bag was created to be functional, comfortable, and timeless. The structured body provides enough space for daily essentials while remaining lightweight and easy to wear.
Design highlights include:
– A simple stitch pattern with a subtle texture
– A sturdy fabric suitable for daily wear
– A modern crossbody shape
– Customizable strap length
This is a versatile crochet bag pattern that transitions easily from casual outings to travel or errands.
Crochet Skill Level
This free crochet crossbody bag pattern is rated advanced beginner.
You should be familiar with:
– Basic crochet stitches
– Consistent tension
– Working in rows
Helpful notes and stitch counts are included throughout the pattern to ensure a smooth crocheting experience.
Materials Needed for a Crochet Crossbody Bag
To make this crochet crossbody bag, you will need the following materials:
– Macrame Soft Polyester Yarn Cord 2-3mm
– 5.25mm/I9 crochet hook
– Scissors
– Measuring tape
– Tapestry needle
– Small Button
– Optional: Stitch marker
Optional additions:
– Fabric lining
– Magnetic snap, zipper, or button closure
Tip: Cotton yarn is highly recommended for crochet bags because it holds its shape and wears well over time.
Finished Size of the Crochet Crossbody Bag
The finished crochet crossbody bag measures approximately:
– Width: 6 inches / 15 cm
– Height: 7 inches / 19 cm
The size can easily be customized by adding or removing rows or adjusting the strap length.
Pattern Notes – Please Read Before Starting
Before beginning the free crochet crossbody bag pattern, please review the following important notes:
– Pattern is written in US crochet terminology
– Ch 3 counts as 1st dc.
– Gauge: 14 hdc x 9 rows (4×4 inch square)
– Stitch counts are provided at the end of each row/ when applicable
– Read through the entire pattern before starting
These notes will help ensure accurate sizing and a successful finished bag
Crochet Abbreviations
**: Repeat instructions between asterisks as described
Ard: Around
Ch: Chain
Dc: Double crochet
Eor: End of row
Hdc: Half double crochet
Rep: Repeat
Sc: Single crochet
Sk: Skip
Sl st: Slip stitch
St: Stitch(es)
Sp: Space
Yo: Yarn over
Free Crochet Crossbody Bag Pattern
Oval Base
Ch 22
Row 1: Hdc in 2nd ch from hook, 1 hdc in each st until last ch (20), 3hdc in last ch. (23)
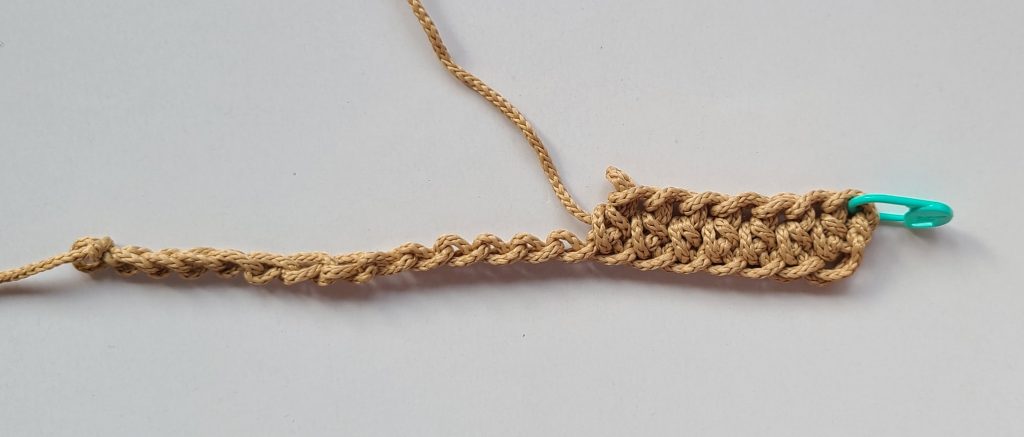
Continue on other side. 1 Hdc in each st until last ch (19), 3hdc in last ch. (22)
You should have 45 hdc total.
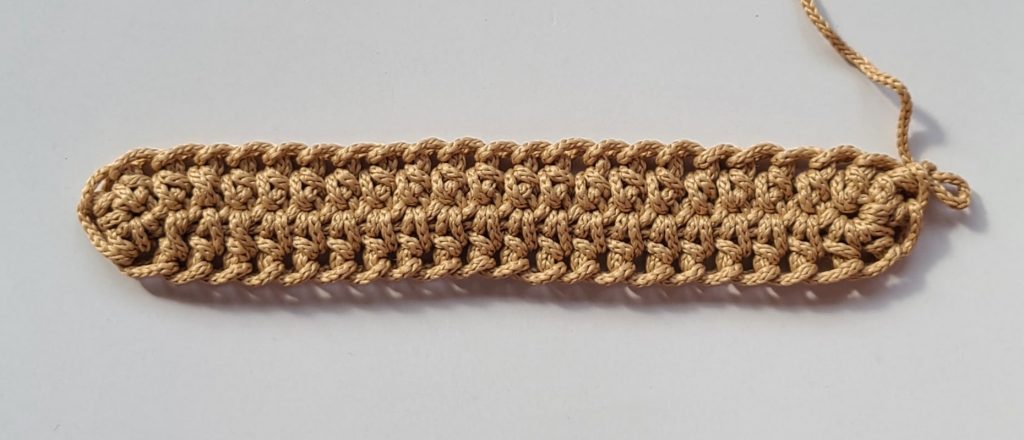
Row 2: Ch 1, 1 hdc in each st ard. (45)
Body of the bag
Row 3: Ch 1, sc in same st, ch 2, sk 2, 1 sc in next st, rep until eor, sk 2, sl st in 1st ch to join.

Row 4: Ch 3, dc in same st, sk 2, 3dc in next st, rep until eor, 1 dc in the same st as first ch3, sl st in 3rd ch of ch3 to join.
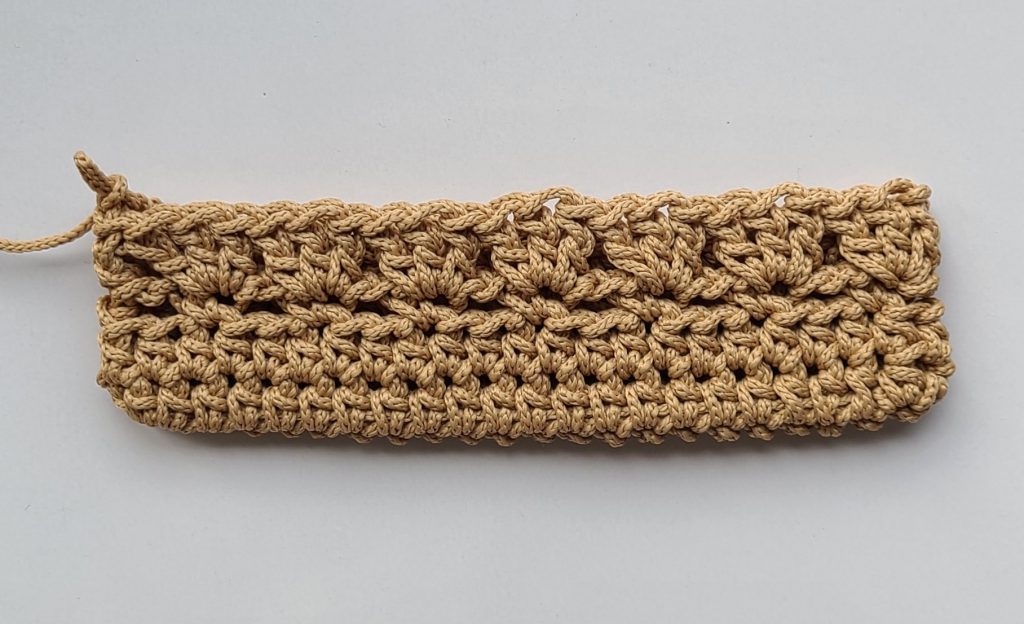
Row 5, 7, 9, 11, 13, 15: Rep Row 3.
Row 6, 8, 10, 12, 14, 16: Rep Row 4.
Row 17: Ch 1, sl st in each st across.
Strap for button:
Attach cord on the back side of the bag and ch 18, sk 4 st and sl st. Tie off and cut cord.
Crochet Crossbody i-Cord Instructions
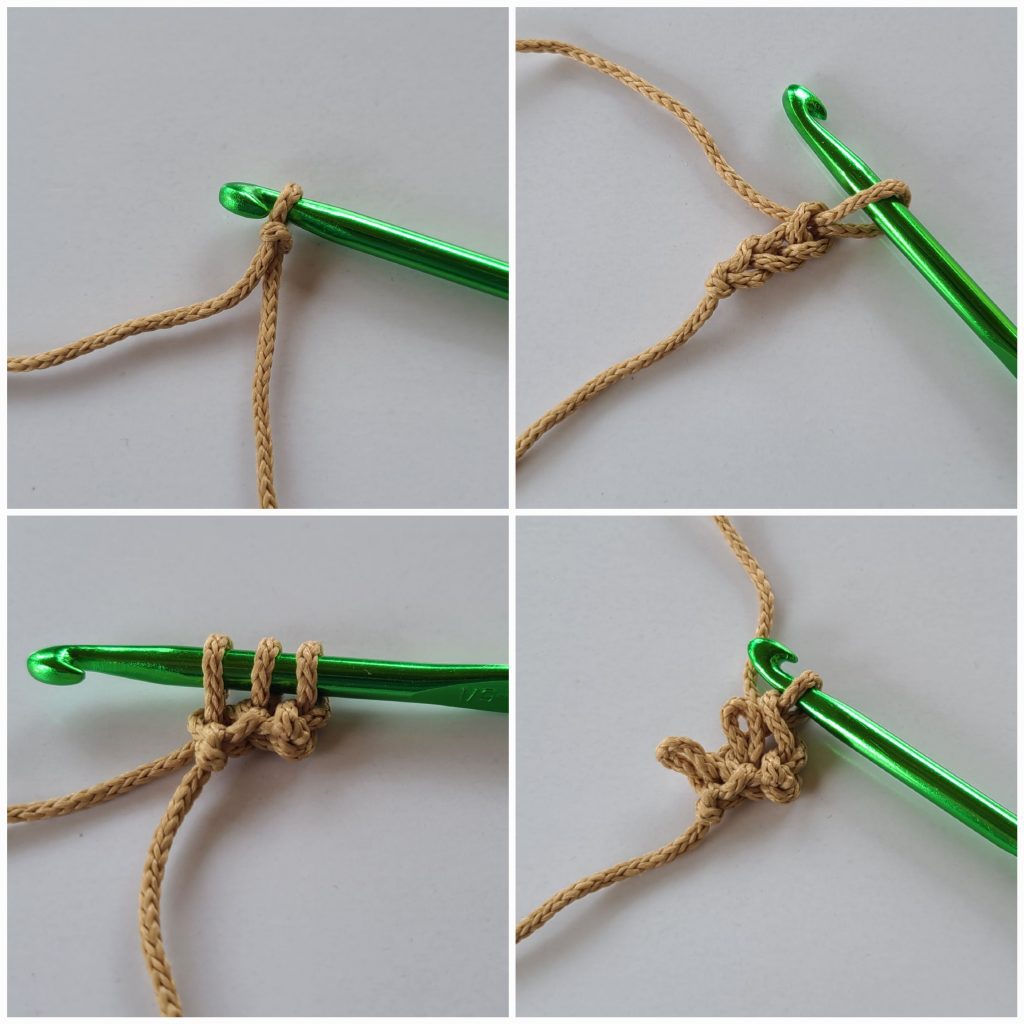
Crochet i-Cord
Make a slip knot, ch 3.
Row 1: Yo, insert hook into 2nd ch from hook, pull up a loop, yo, insert hook in next ch, pull up a loop (you should have 3 loops on your hook).
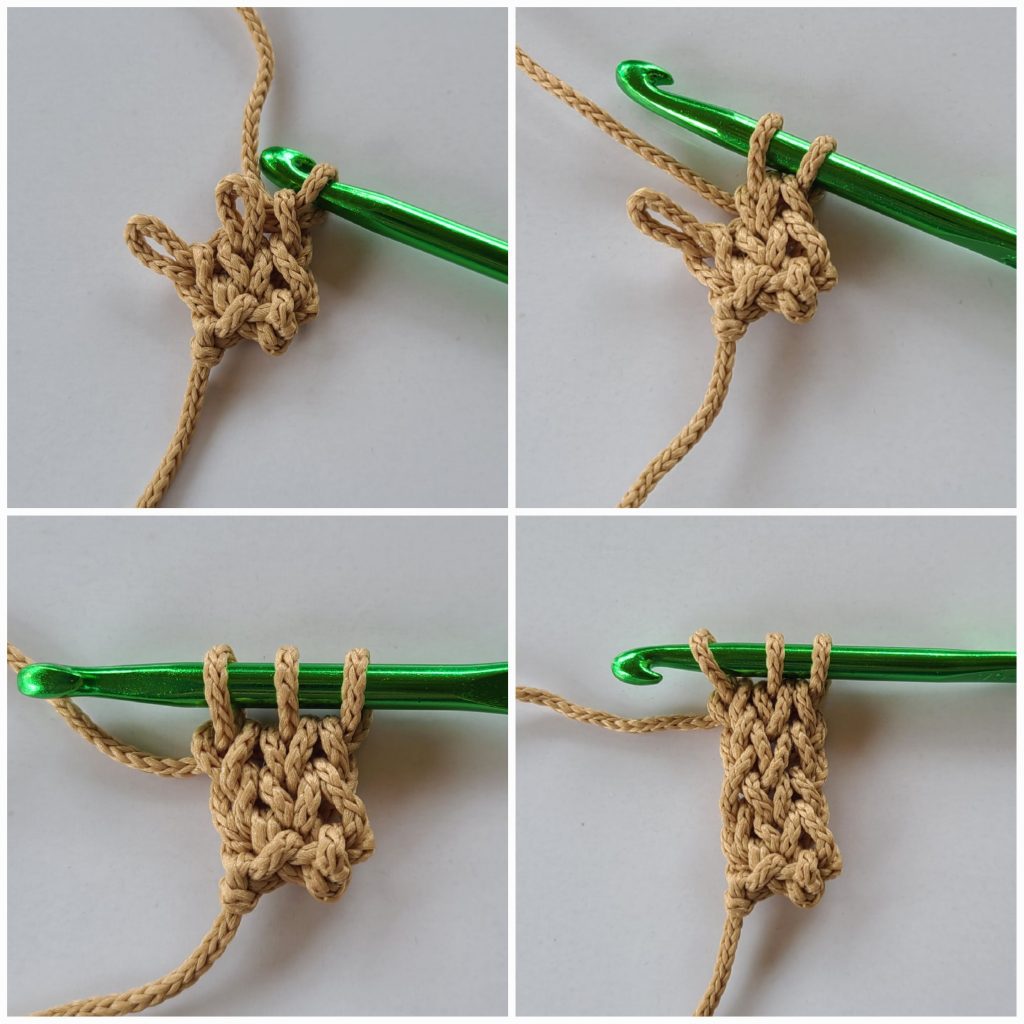
Row 2: Drop 2 loops off the hook and hold them firmly to stop them from coming undone. Ch 1 into remaining loop, ch 1 into next loop, ch 1 into last loop (3 loops on hook).
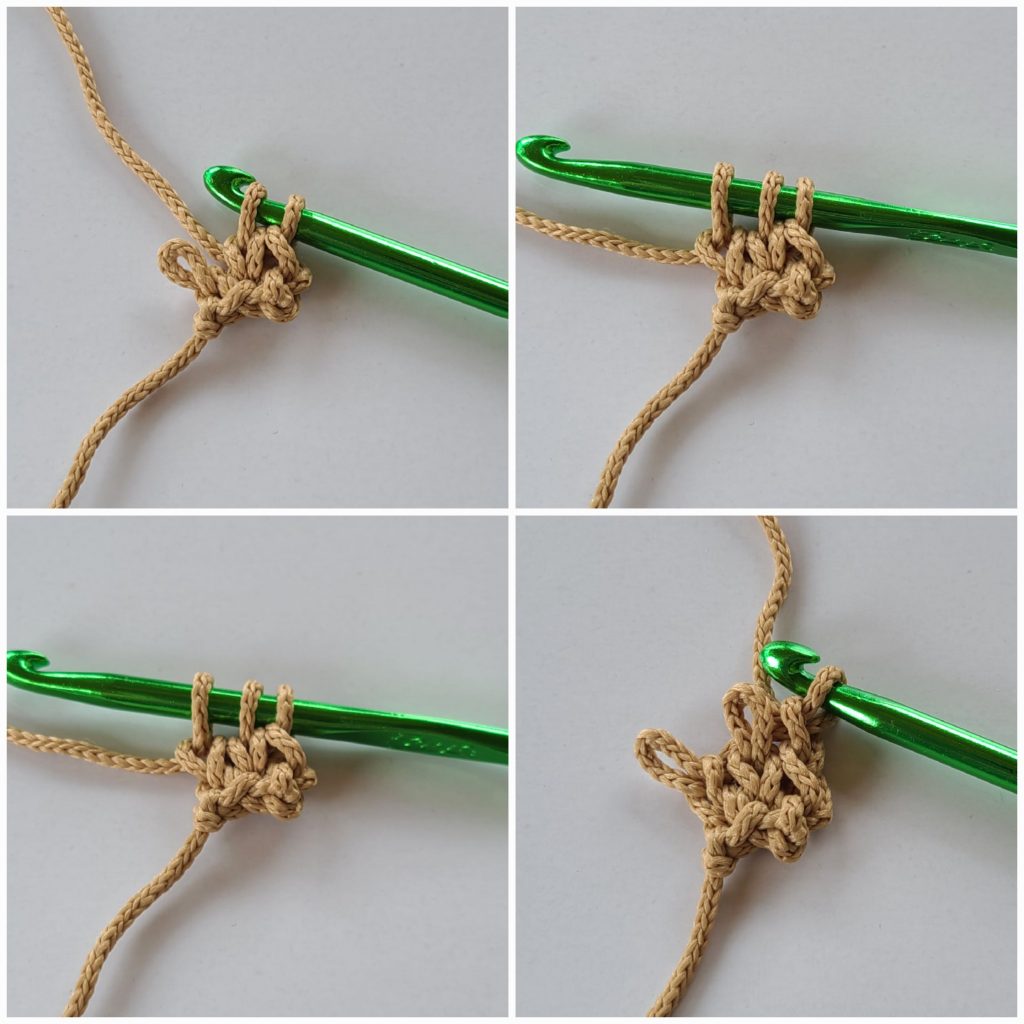
Repeat Row 2 until the cord is the length you desire. I made 89 rows.
Printable PDF Version
If you prefer an ad-free, printable PDF, you can purchase the pattern here:
👉 Link to Etsy