
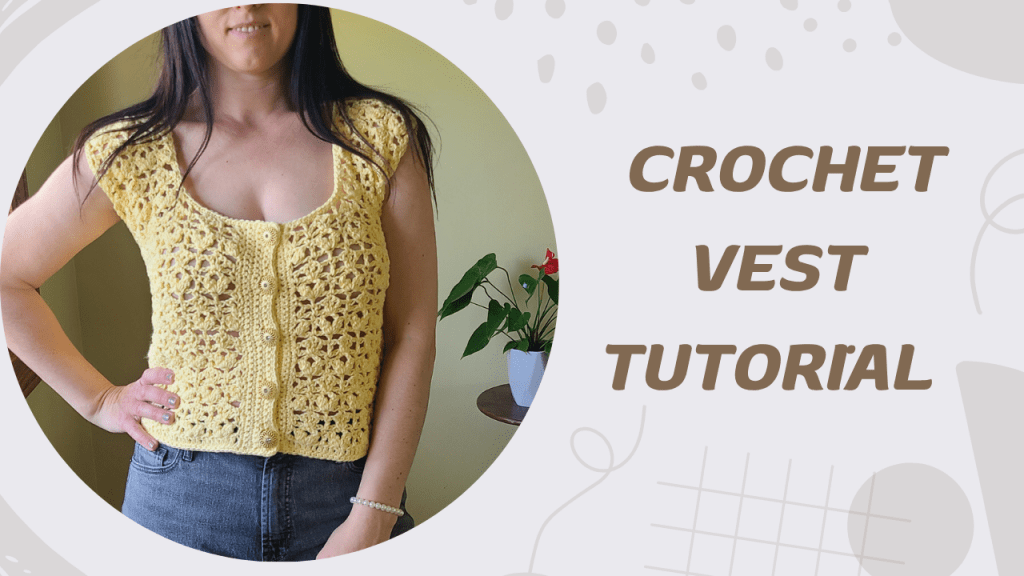
The Aryna Crochet Vest is a beautiful blend of simplicity and elegance, making it a must-have piece for any handmade wardrobe. Designed with clean lines and a comfortable fit, this crochet vest is perfect for layering over your favorite outfits, whether you’re dressing up or keeping it casual.
This free crochet vest pattern is approachable and relaxing to make, using basic stitches to create a polished and timeless look. It’s a great project for those who enjoy mindful crocheting while still ending up with something stylish and wearable.
With just a few materials and some creative time, you’ll have a versatile crochet vest that you can wear year-round.
Aryna Crochet Vest: Notes
- This pattern is written in US terms
- Take measurements of your body so you can chain accurate amount of stitches
- Ch 3 counts as 1st dc
- Multiple of 6 + 3 – see chart for size adjustments
- After each 3dctog cluster, ch 1 to close the cluster — this ch-1 counts as a stitch
Materials
To make the Aryna Crochet Vest, you will need:
- I Love This Cotton Yarn
Color: Buttercup - You will need approximately 240 (280, 340, 400, 440, 500) g of yarn for sizes S ( M, L, XL, XXL, 3XL).
- 5.0 mm crochet hook (or size needed to meet gauge) – US size H-8
- Scissors
- Tapestry needle
- Measuring tape
Aryna Crochet Vest Sizing
Instructions are written for: S–3XL
Always check your gauge before starting.
Example:
“This crochet crop top is designed to fit snugly with slight stretch. For a looser fit, size up.”
| Size Chest (in) | Length (in) | Width (in) |
| S (32–34) | 18 | 16.4 |
| M (36–38) | 19 | 18 |
| L (40–42) | 20.3 | 19.6 |
| XL (44–46) | 20.3 | 21.2 |
| XXL (48-50) | 21.6 | 22.8 |
| 3XL (52–54) | 21.6 | 24.4 |
Made-to-Measure Option
Although starting chain counts are provided for each size, this crochet lacy top can easily be made to measure for a custom fit while maintaining its relaxed ease. Create a starting chain that fits comfortably around your bust (or desired width) without stretching. Be sure the chain follows the stitch multiple used in the pattern. Once the correct length is reached, continue working the pattern as written. This option allows you to customize the fit while keeping the airy, relaxed look of the design.
Made-to-Measure: Step-by-Step for Beginners
Measure around your bust at the fullest point.
Add 2–4 inches (5–10 cm) for relaxed ease.
Chain stitches until the chain length matches your measurement, keeping the chain loose and even.
Adjust the number of chains to match the stitch multiple used in the pattern.
Begin Row 1 and follow the pattern as written once the chain fits comfortably without stretching.
Helpful Tip
Always check your gauge before starting, especially when working a crochet lacy top with relaxed ease. Even small differences in tension can change the fit.
Gauge
4 inch x 4 inch = 14 sts x 8 rows
Aryna Crochet Vest: Skill Level
Intermediate – Suitable for crocheters comfortable with lace stitches and garment construction.
You should be comfortable with:
- Chains
- Double crochet
- Working in rows
- Simple shaping
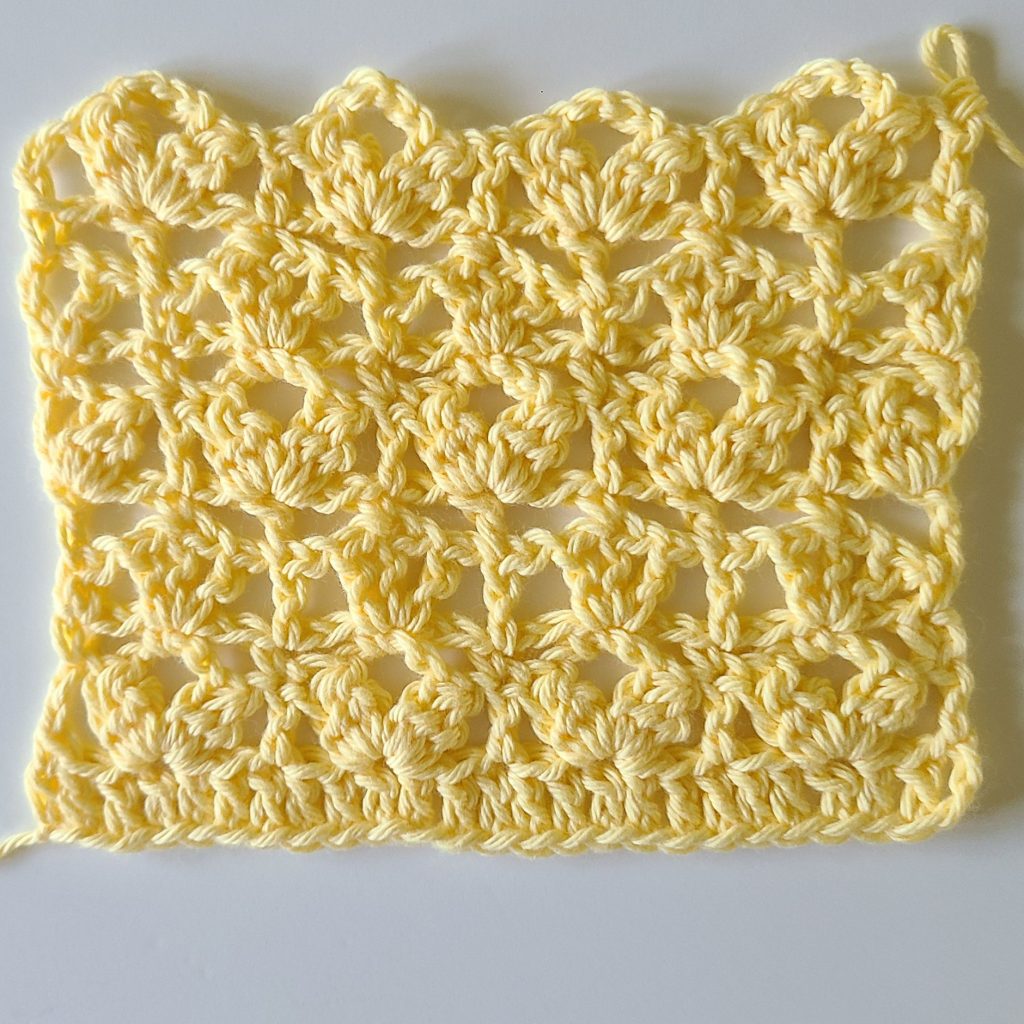
How to Crochet 3 dc tog into One Stitch
The 3 dc tog stitch creates a cluster by combining three double crochets from one stitch into a single stitch at the top.
Step-by-Step Instructions:
- Yarn over (YO) and insert your hook into the stitch.
- YO and pull through, leaving 3 loops on the hook.
- YO and pull through 2 loops, leaving 2 loops on the hook (first dc started).
- Repeat steps 1–2 two more times in the same stitch — after the third dc, you should have 4 loops on your hook.
- YO and pull through all 4 loops — this completes the 3 dc tog cluster.
Tips for Beginners:
- Always leave the last loop of each dc on the hook until you finish the cluster.
- The top of the cluster counts as one stitch, so adjust your stitch count accordingly.
Variation: 3 dc tog with Chain-3 in One Stitch
For some rows, you may work two clusters separated by a chain-3 in the same stitch.
Abbreviation / Pattern Line:(3dctog, ch 3, 3dctog) in same st – Work a 3 dc tog cluster, chain 3, then another 3 dc tog into the same stitch.
- The chain-3 counts as part of the stitch spacing.
- Each cluster’s top counts as one stitch in your stitch count.
Tip: This creates a decorative openwork cluster that’s perfect for the lace dense stitch in the Ira Crochet Top.
Aryna Crochet Vest: Abbreviations
US terms used
**: Repeat instructions between asterisks as described
Ard: Around
Ch: Chain
Sc: Single crochet
Dc: Double crochet
Rep: Repeat
Sk: Skip
Sl st: Slip stitch
St: Stitch(es)
3dctog: 3 double crochets together
Follow along with the video tutorial below to create your own easy crochet vest with confidence.
Aryna Crochet Vest: Pattern Instructions
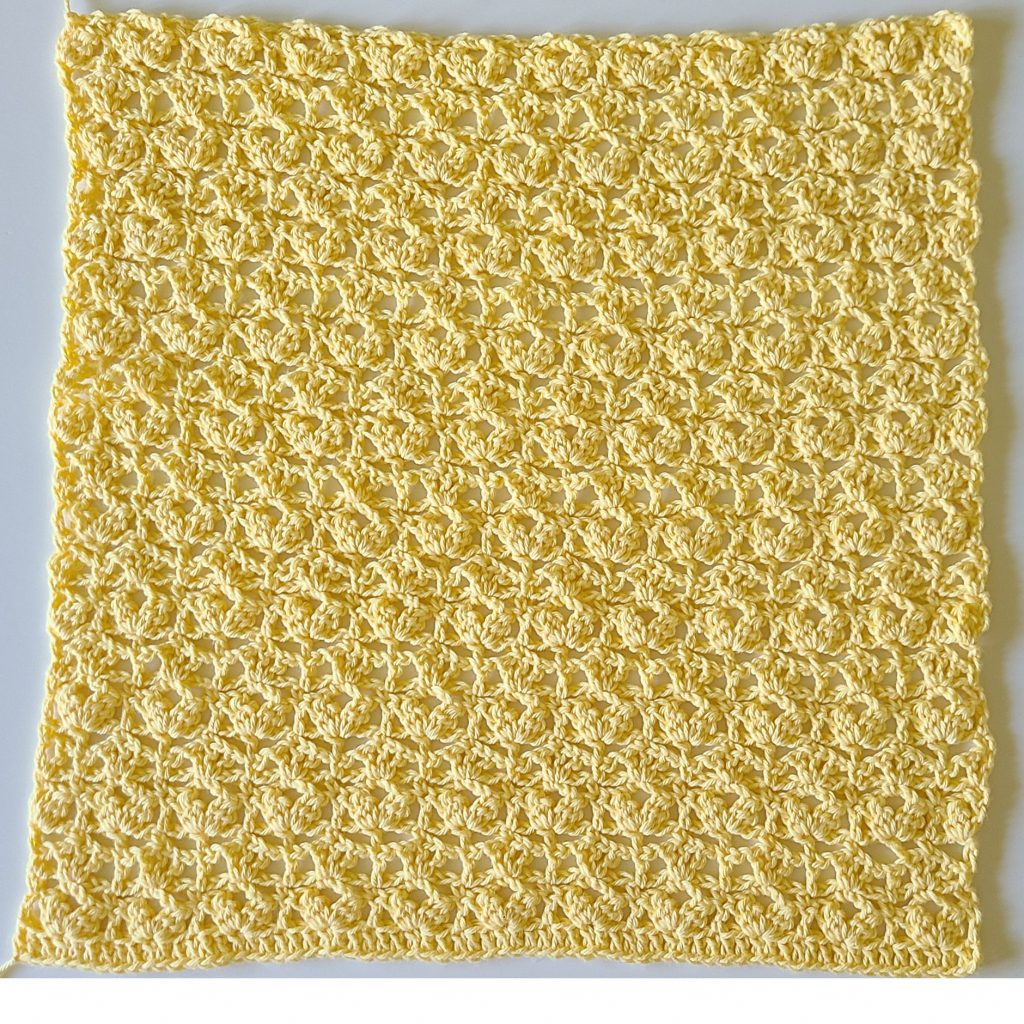
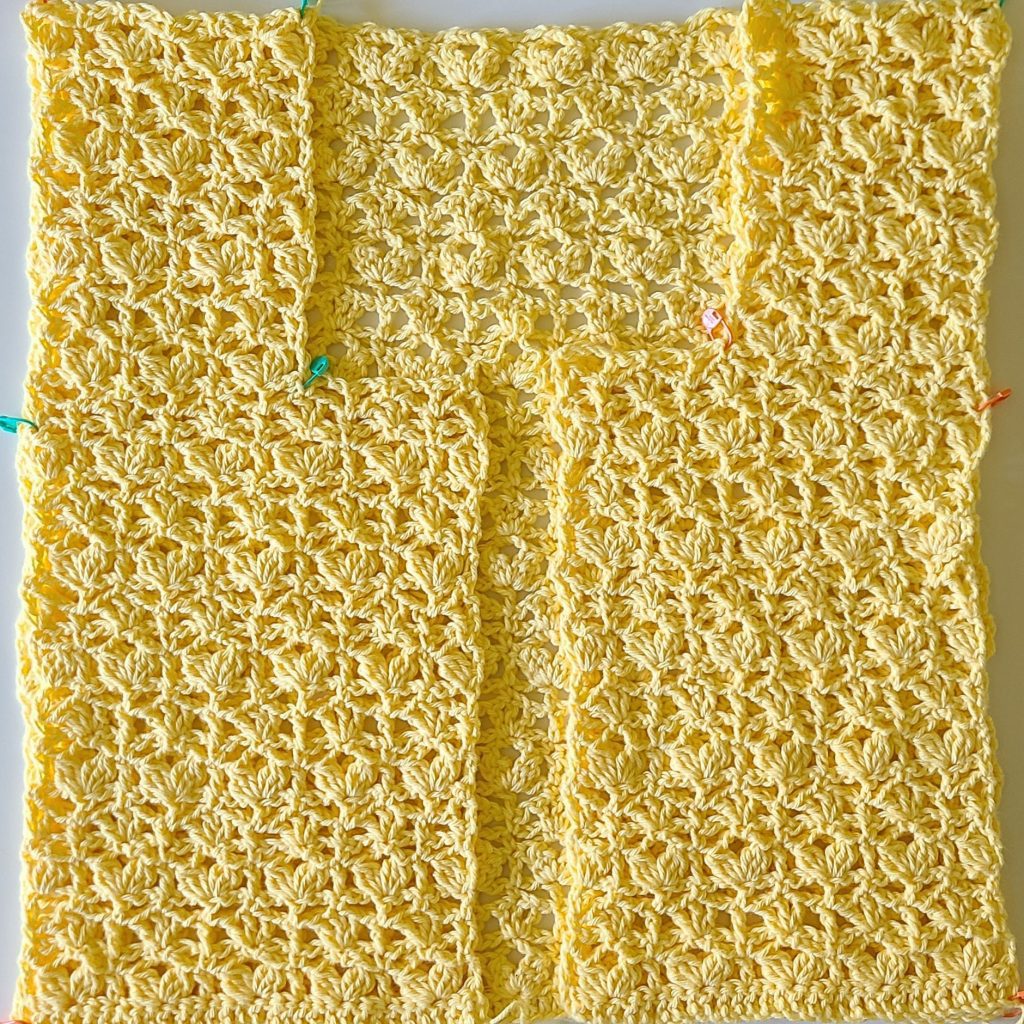
Back Panel
Ch 63 (S), 69 (M), 75 (L) 81 (XL), 87 (XXL), 93 (3XL) or any multiple of 6 + 3
Row 1: Dc in 4th ch from hook and in each ch across.
Row 2: Ch 3, turn. Dc into the same first st. Skip 2, (3dctog, ch 3, 3dctog) in next st, skip 2, dc into next st — repeat from * to * across.
Row 3: Ch 1, turn. Sc in first st. Ch 2, skip 3 sts, sc in next st; repeat from * to * across.
Row 4: Ch 1, turn. Sc in first st. Ch 1, skip 2 sts, (dc, ch 1, dc, ch 1, dc) in next st, ch 1, skip 2 sts, dc in next st;
repeat from * to * across.
Row 5: Ch 5, turn. Skip 3 sts, sc in next st. Ch 2, skip 3 sts, dc in next st, ch 2, skip 3 sts, sc in next st; repeat from * to * across.
Row 6: Ch 4, turn. 3 dc tog in first st. Skip 2 sts, dc in next st, skip 2 sts, (3dctog, ch 3, 3dctog) in next st; repeat from * to * across. 3dctog in last st, ch 1, dc in same last st.
Row 7: Repeat Row 3.
Row 8: Ch 4, turn. Dc in first st, ch 1, skip 2 sts, sc in next st. Ch 1, (dc, ch 1, dc, ch 1, dc) in next st, ch 1, skip 2 sts, sc in next st; repeat from * to * across.
Row 9: Ch 1, turn. Sc in first st, ch 2, skip 3 sts, dc in next st. Ch 2, skip 3 sts, sc in next st, ch 2, skip 2 sts, dc in next st; repeat from * to * across.
Row Repeat:
Repeat Rows 2–9 until your piece reaches:
- S: 37 rows
- M: 39 rows
- L & XL: 41 rows
- XXL & 3XL: 43 rows
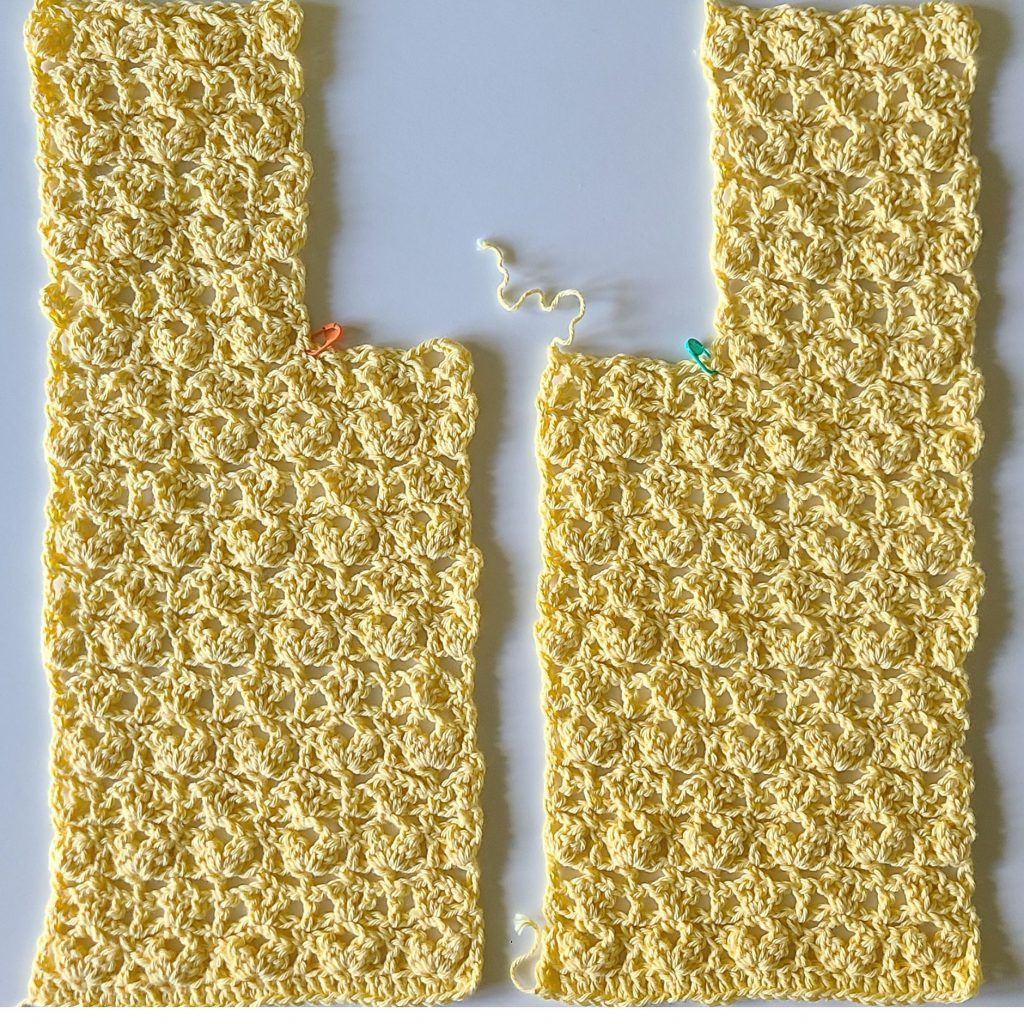
Aryna Crochet Vest: Front Panels
Foundation Chain:
Ch 27 (S), 33 (M), 39 (L), 39 (XL), 45 (XXL), 45 (3XL)
—or any multiple of 6 + 3.
Main Panel (All Sizes)
Work the same stitch pattern as the Back Panel (Rows 2–9 repeat) until you reach:
- S: Row 23
- M: Row 25
- L & XL: Row 27
- XXL & 3XL: Row 29
Size S front panel (right side when wearing it)
Row 24: Ch 4, turn. Dc in first st, ch 1, skip 2 sts, sc in next st, ch 1, skip 2 sts, (dc, ch 1, dc, ch 1, dc) in next st, ch 1, skip 2 sts, sc in next st, ch 1, skip 2 sts, (dc, ch 1, dc) in next st. → You should end at the 13th stitch from the edge.
Row 25: Ch 1, turn. Sc in first st, ch 2, skip 3 sts, dc in next st, ch 2, skip 3 sts, sc in next st; repeat from * to * once more.
Rows 26–37: Continue in established stitch pattern (Rows 2–9 repeat) to Row 37.
Size S front panel (left side when wearing it)
At the end of Row 23, fasten off. Turn.
Reattach yarn in the 13th stitch from the edge.
Row 24: Repeat Row 24 of Right Front Panel.
Row 25: Repeat Row 25 of Right Front Panel.
Rows 26–37: Continue in established stitch pattern (Rows 2–9 repeat) to Row 37.
Size M front panel (right side when wearing it)
Row 26: Ch 3, turn. Dc in first st. Skip 2 sts, (3 dc tog, ch 3, 3 dc tog) in next st, skip 2 sts, dc in next st;
repeat from * to * 2 more times. → End at the 19th stitch from the edge.
Row 27: Ch 1, turn. Sc in first st, ch 2, skip 3 sts, sc in next st; repeat across.
Rows 28–39: Continue in stitch pattern (Rows 2–9 repeat) to Row 39.
Size M front panel (left side when wearing it)
At the end of Row 25, fasten off. Turn.
Reattach yarn in the 19th stitch from the edge.
Work Rows 26–39 the same as Right Front Panel.
Size L and XL front panel (right side when wearing it)
Row 28: Ch 1, turn. Sc in first st. Ch 1, skip 2 sts, (dc, ch 1, dc, ch 1, dc) in next st, ch 1, skip 2 sts, dc in next st; repeat from * to * 3 more times. → End at 25th stitch
Row 29: Ch 5, turn. Skip 3 sts, sc in next st. Ch 2, skip 3 sts, dc in next st, ch 2, skip 3 sts, sc in next st; repeat from * to * 2 more times, ch 2, skip 3 sts, dc in last st.
Rows 30–41: Continue in stitch pattern to Row 41.
Size L and XL front panel (left side when wearing it)
At the end of Row 27, fasten off. Turn.
Reattach yarn at: 25th stitch
Work Rows 28–41 as for Right Front Panel.
Size XXL and 3XL front panel (right side when wearing it)
Row 30:
Ch 4, turn. 3 dc tog in first st. Skip 2 sts, dc in next st, skip 2 sts, (3 dc tog, ch 3, 3 dc tog) in next st; repeat from * to * 3 more times, 3 dc tog in last st, ch 1, dc in same st. → End at: 31st stitch
Row 31: Ch 1, turn. Sc in first st, ch 2, skip 3 sts, sc in next st; repeat across.
Rows 32–43: Continue in stitch pattern to Row 43.
Size XXL and 3XL front panel (left side when wearing it)
At the end of Row 29, fasten off. Turn.
Reattach yarn at: 31st stitch
Work Rows 30–43 as for Right Front Panel.
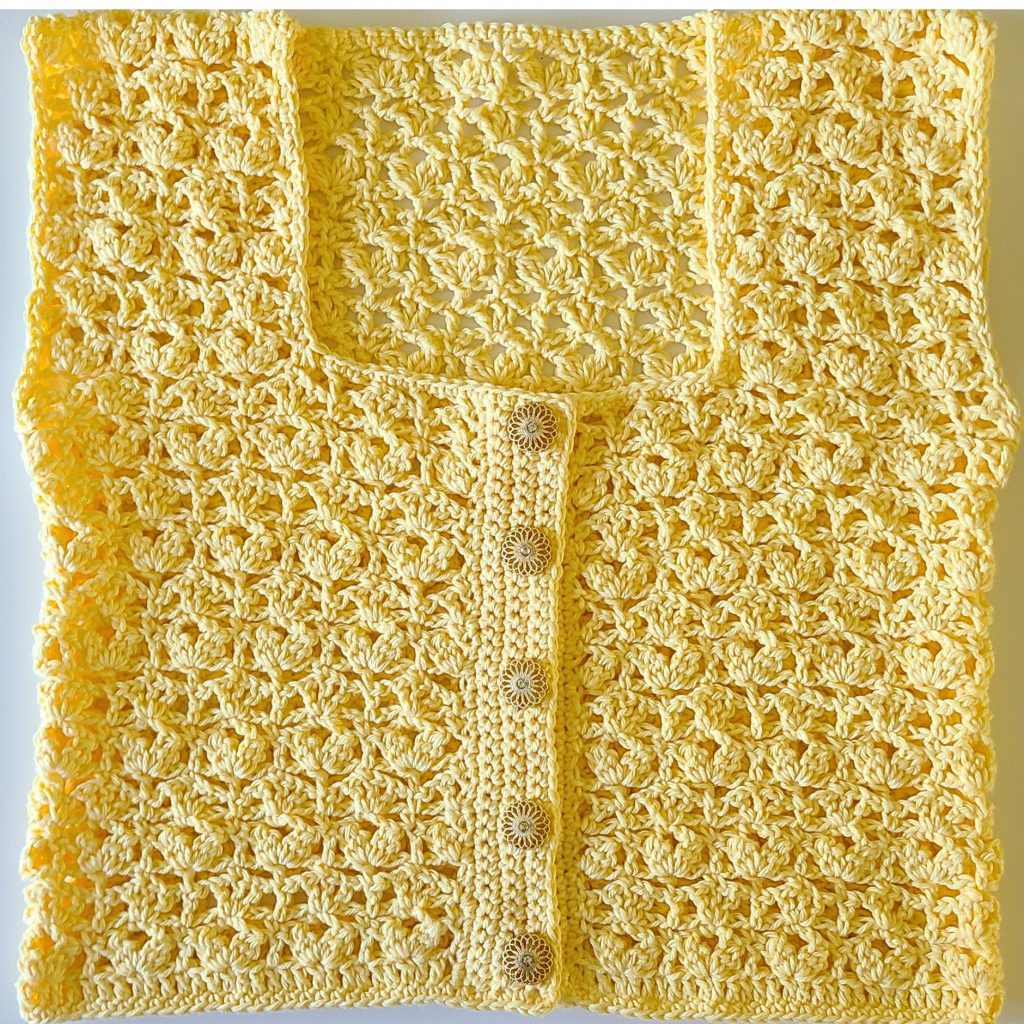
Aryna Crochet Vest: Assembly
- Sew back and front panels together along the upper shoulders.
- Sew back and front panels together along side seams.
- Weave in all ends.
Leave space for the armholes. The recommended armhole openings are:
- Size XS & S: 7 inches
- Size M: 8 inches
- Size L & XL: 9 inches
- Size XXL & 3XL: 10 inches
Make sure to leave these measurements when shaping the panels so your top fits comfortably around the arms.
Aryna Crochet Vest: Front ribbing
Note on Front Ribbing (Button Band Width Adjustment)
Because the starting chain is worked in a multiple of 6 + 3, the width of the front panels cannot be adjusted further for certain sizes. As a result, the number of ribbing rows differs slightly between sizes.
- Sizes S, M, XL, and 3XL: work 6 rows of single crochet (sc) for the front ribbing.
- Sizes L and XXL: work 5 rows of single crochet (sc) for the front ribbing.
Buttonholes:
For all sizes, buttonholes are created on Row 2 of the front ribbing.
Right side when wearing it.
Row 1: Attach yarn. Ch 1, sc in first st and in each st across. Turn.
Rows 2–4: Repeat Row 1.
Row 5 (Buttonhole Row): Ch 1, turn. Sc in first st, ch 3, skip 3 sts, sc in next 6 sts; repeat from * to * across. Turn.
Row 6: Repeat Row 1.
Left side when wearing it.
Row 1: Attach yarn. Ch 1, sc in first st and in each st across. Turn.
Rows 2–5: Repeat Row 1.
Final Edging (All Around)
Row 7: Starting from the right front ribbing, work continuously around the entire edge: right front, neckline, left front, and bottom edge.
Ch 1, work sc evenly around, placing 1 sc in each st and spacing evenly along the edges.
Join with a slip stitch to the first sc.
✨ Notes
- The right front includes buttonholes; the left front is plain.
- Space your stitches evenly when working along edges to avoid puckering.
- You can adjust buttonhole spacing if needed.

Aryna Crochet Vest: Armhole Edging
Row 1: Attach yarn at the underarm. Ch 1, slip stitch in first st and in each st evenly around the armhole.
Join with a slip stitch to the first st. Fasten off.
✨ Notes
Repeat for the second armhole.
Work slip stitches loosely to avoid a tight edge.
Make sure stitches are evenly spaced around the armhole for a smooth finish.
Sewing Buttons
Place your buttons along the right front panel, aligning them with the buttonholes.
- Use stitch markers to mark button placement before sewing.
- Ensure buttons line up perfectly with the buttonholes.
- Sew securely using a tapestry needle and matching yarn or thread.
- Check that buttons fasten comfortably without pulling.
Final Touches
- Weave in all loose ends securely.
- Lightly steam block if needed for extra shaping.
- Try on your vest and enjoy your handmade piece!
The Aryna design is the perfect crochet vest pattern if you’re looking for something simple, stylish, and enjoyable to make. Whether you’re new to garments or experienced, this crochet vest will quickly become a favorite in your handmade collection.
If you enjoyed making this crochet vest, you might also like exploring the other vest designs available on my blog, all offered as free patterns. Each version features its own unique construction, stitch details, and fit variations, so you can find the perfect style for every season and wardrobe. You can browse the full collection here: Crochet Vests