
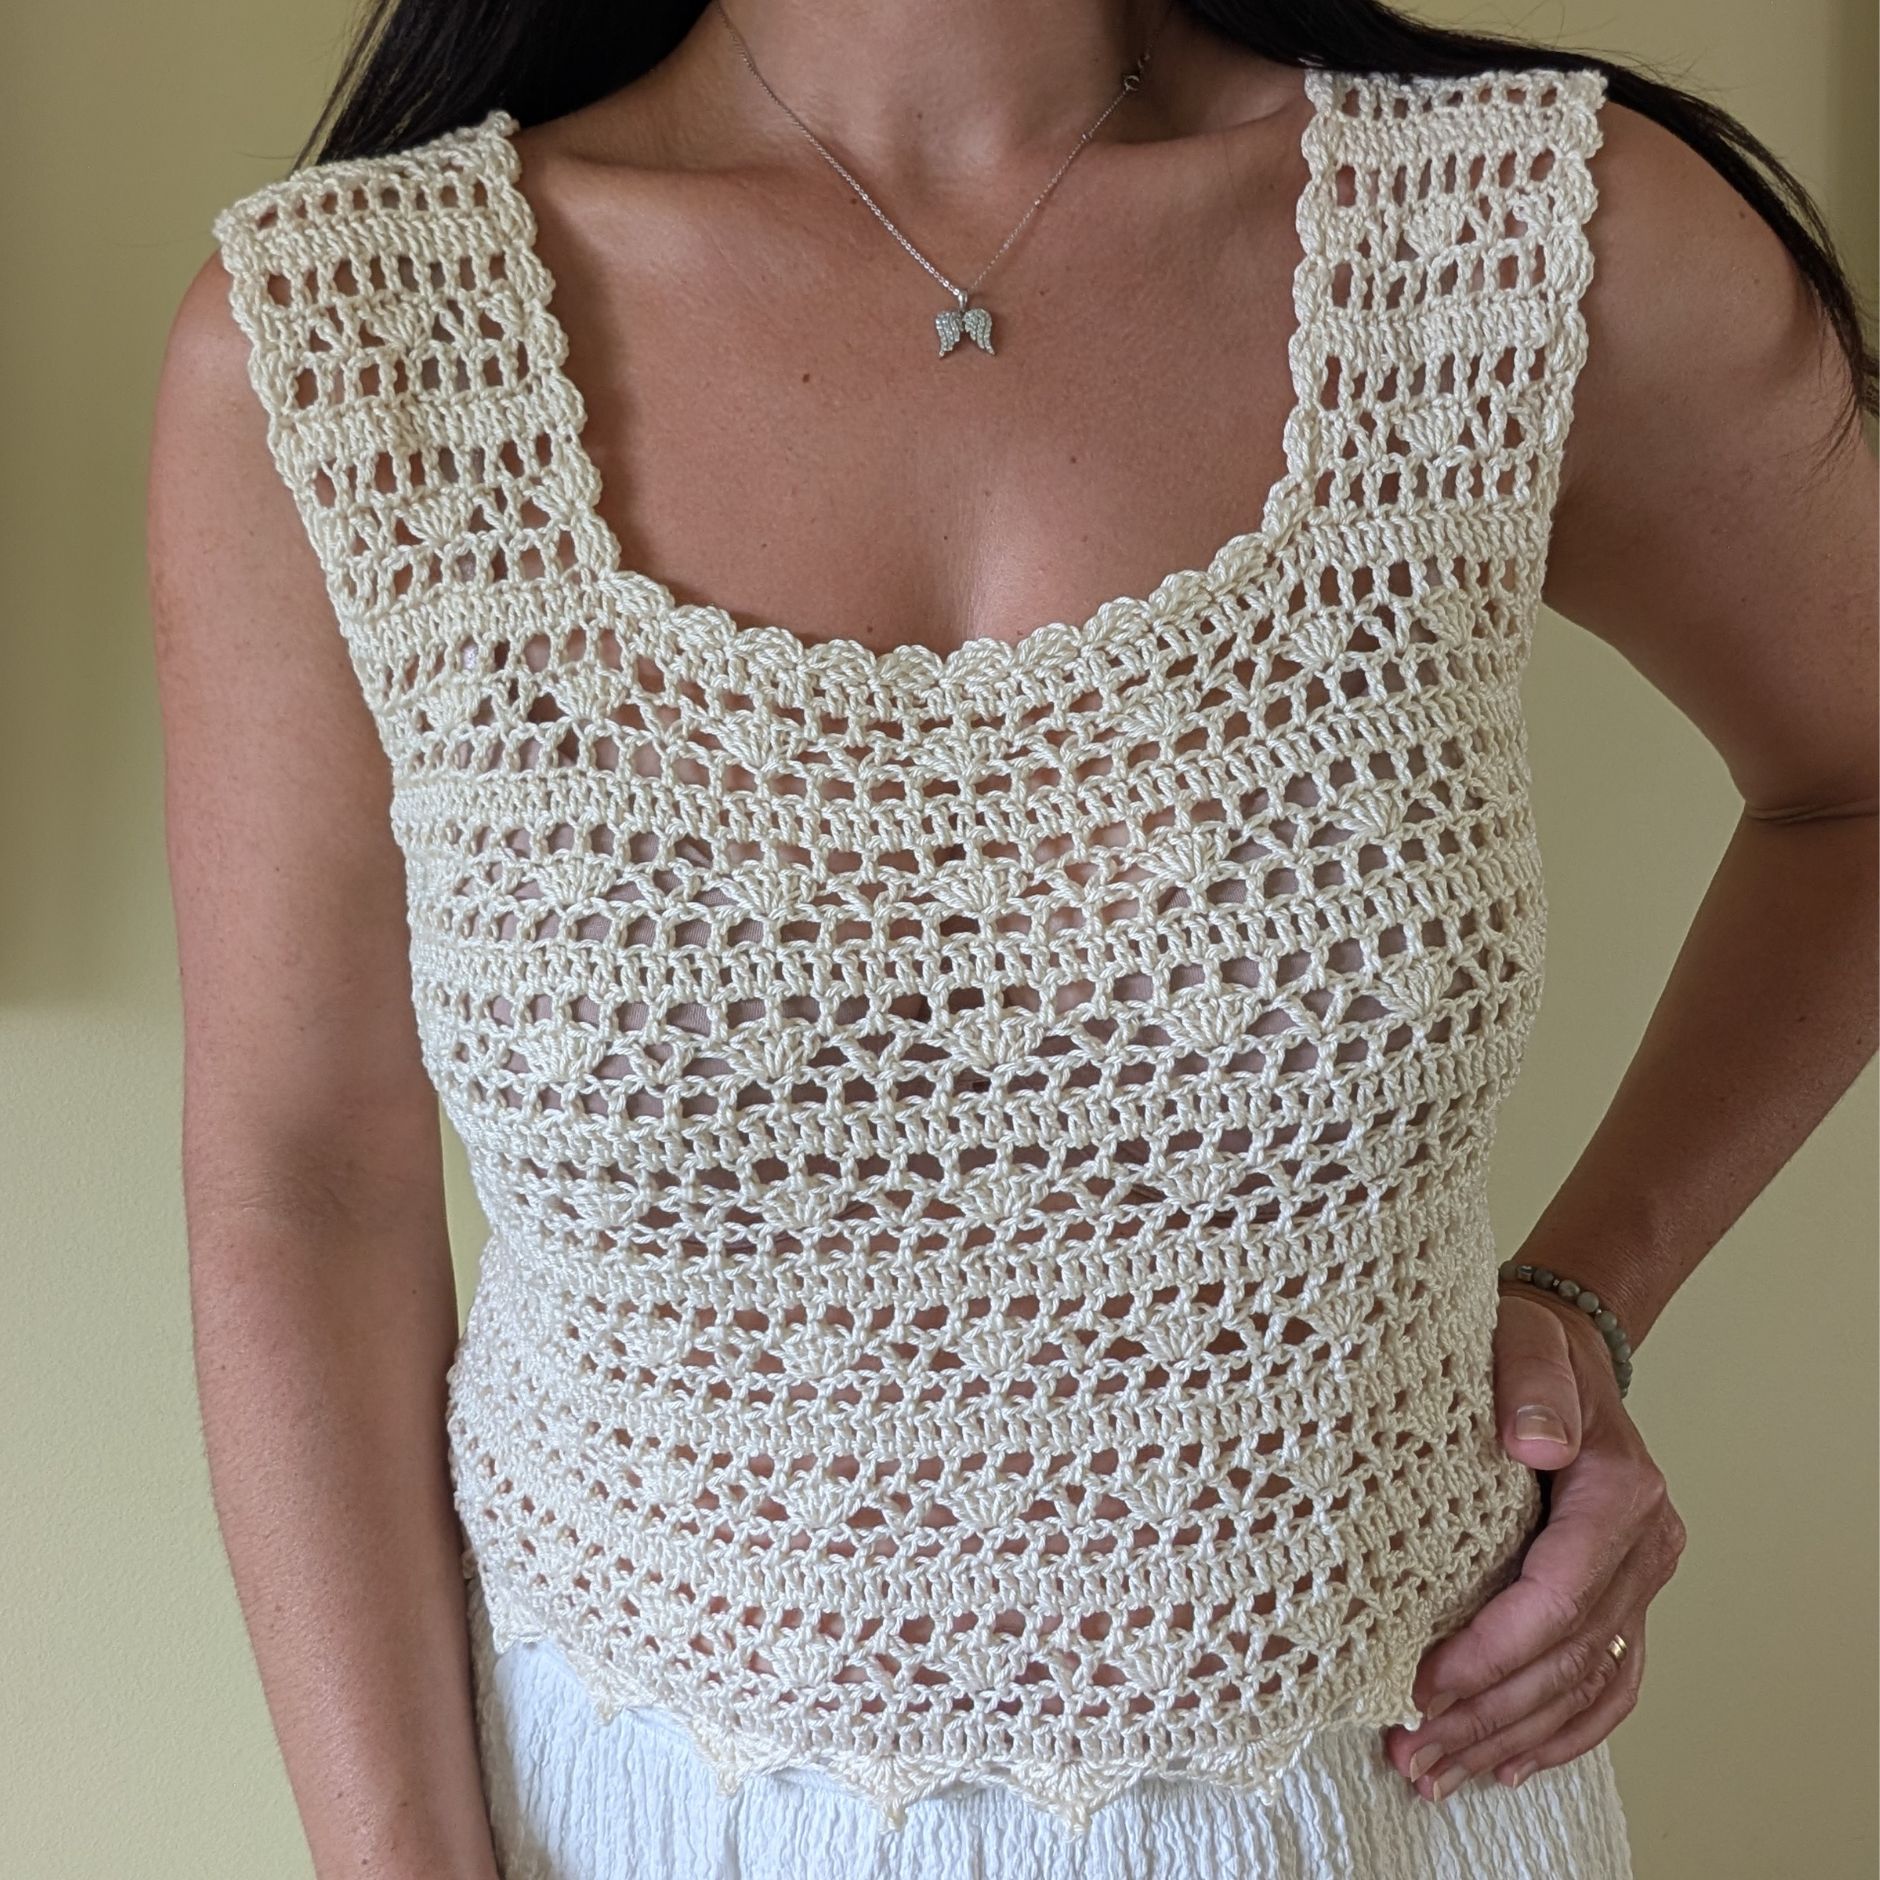
If you’ve been looking for the perfect crochet lace top to wear during the warmer months, the Aviana Crochet Lace Top is a beautiful project to add to your handmade wardrobe.
Designed with a delicate lace stitch pattern, this lightweight crochet top is feminine, breathable, and comfortable to wear. The simple construction makes it an enjoyable project for confident beginners and experienced crocheters alike. The top is worked in two separate panels that are joined together at the shoulders and sides before adding a simple edging for a polished finish.
Whether you’re pairing it with jeans, linen pants, or a flowing skirt, the Aviana Crochet Lace Top creates an effortless summer look.
This free crochet pattern includes detailed written instructions, step-by-step photos, and a complete YouTube video tutorial so you can crochet along with confidence.
Table of Contents
- About the Aviana Crochet Lace Top
- Materials
- Yarn Suggestions
- Crochet Abbreviations
- Finished Measurements
- Gauge
- Pattern Notes
- Front Panel
- Back Panel
- Joining the Panels
- Finishing
- Video Tutorial
- Final Thoughts
About the Aviana Crochet Lace Top
The Aviana Crochet Lace Top is a lightweight, feminine crochet lace top that’s perfect for spring and summer. Designed with a beautiful open lace stitch, it creates an elegant look while remaining comfortable and breathable.
This pattern is beginner-friendly and features a simple construction. The top is made by crocheting two identical panels—a front panel and a back panel—which are then sewn together at the shoulders and sides. Once assembled, a simple edging is added around the neckline and bottom for a polished finish.
Whether you’re making it for yourself or as a thoughtful handmade gift, the Aviana Crochet Lace Top is a timeless wardrobe piece that pairs beautifully with skirts, shorts, or jeans.
Aviana Crochet Lace Top: Materials
For this project I used Catania Originals 100% Mercerized Cotton Yarn in Color 130 Cream. This fine sport weight cotton yarn gives the top excellent stitch definition, a soft feel, and a beautiful drape that highlights the lace pattern.
Materials Needed
- Catania Originals 100% Mercerized Cotton Yarn, Yarn Weight: Fine/Sport (#2), Color: 130 Cream
- You will need approximately 165 (175, 186, 215, 245, 285, 320) g of yarn for sizes XS (S, M, L, XL, XXL, 3XL).
- 4 mm (G/6) crochet hook
- Yarn needle
- Scissors
- Stitch markers (optional)
- Measuring tape
Skill Level: Intermediate beginner
Yarn Substitutions
If Catania Originals isn’t available in your area, you can substitute it with any Fine/Sport (#2) 100% cotton yarn that meets gauge. Here are a few great alternatives:
- Hobbii Rainbow Cotton 8/4 (100% Cotton, Sport #2)
- Drops Safran (100% Egyptian Cotton, Sport #2)
- Scheepjes Catona (100% Mercerized Cotton, Sport #2)
- Sirdar Happy Cotton (100% Cotton, Sport #2)
- Rico Essentials Crochet (100% Mercerized Cotton, Sport #2)
- Patons Grace (100% Mercerized Cotton, Sport #3 – may require a smaller hook to match gauge)
- Katia Capri (100% Mercerized Egyptian Cotton, Sport #2)
“Prefer an ad-free version? Click here to purchase the printable PDF pattern on Etsy.”
Important Note
Different yarn brands can vary slightly in thickness and drape, even if they are labeled as the same weight. Before starting your project, crochet a gauge swatch and adjust your hook size if needed to achieve the correct measurements. Mercerized cotton yarns are recommended for this pattern because they provide excellent stitch definition, durability, and a beautiful drape that enhances the lace design.
Aviana Crochet Lace Top: Crochet Abbreviations
The following US crochet terms are used throughout this pattern:
- ch – chain
- sl st – slip stitch
- dc – double crochet
- sp – space
- st (s) – stitch (es)
- rep – repeat
- sk – skip
- dc2tog = double crochet 2 together
- **: repeat instructions between asterisks as described
- ard: around
Stitch Guide
dc 2 tog (2 double crochet together) — Cluster Stitch
Abbreviation: dc 2 tog
A dc 2 tog creates a cluster by working two unfinished double crochets into the same stitch and joining them together at the top to form one stitch.
Finished Measurements
The Aviana Crochet Lace Top is designed with a comfortable, slightly relaxed fit that makes it perfect for everyday wear.
Finished measurements will vary depending on the size you make. Be sure to check your gauge before starting to ensure the best fit.
| Size | Width ( inches) | Length (inches) |
|---|---|---|
| XS | 15.4 | 20 |
| S | 17.2 | 20 |
| M | 19 | 20 |
| L | 20.8 | 20 |
| XL | 22.6 | 21.5 |
| XXL | 24.4 | 21.5 |
| 3XL | 26.2 | 21.5 |
Aviana Crochet Lace Top: Gauge
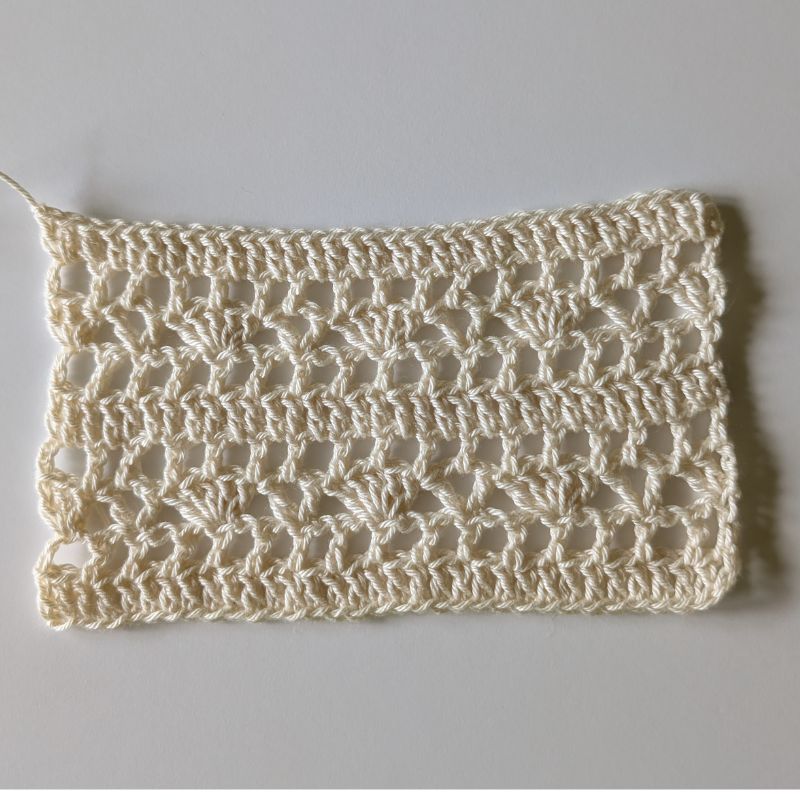
Checking your gauge is important to ensure your finished top has the correct size and fit.
Work the gauge swatch using the same yarn and a 4 mm crochet hook. Measure your swatch after lightly blocking it if desired. If your gauge is too large, use a smaller hook. If it is too small, use a larger hook.
4” x 4” square = 17 sts x 10 rows in lace stitch pattern after steam blocking
Pattern Notes
- This pattern uses US crochet terminology.
- The top is worked in two separate panels.
- The front and back panels are identical in construction.
- Panels are sewn together at the shoulders and side seams.
- Read through the entire pattern before beginning.
- Ch 3 counts as the first dc throughout.
- Size from the pictures is Medium.
- The lace pattern consists of a 4-row repeat.
- Gauge is measured over one complete 4-row pattern repeat.
- The fabric relaxes and grows slightly after steam blocking.
- Finished measurements are based on blocked fabric.
- Ch2 spaces are counts as one stitch.
- Weave in all yarn ends securely before wearing.
- Multiple of 8 + 3 (see size chart for adjustments).
Aviana Crochet Lace Top: Main Panel
Foundation Chain
Ch 67 (75, 83, 91, 99, 107, 115) for sizes XS (S, M, L, XL, 2XL, 3XL) or any multiple of 8 + 3.
Row 1: Dc into 4th ch from hook, dc across.
Row 2: Ch 4 (counts as a first dc + ch 1), turn, *[ch 1, sk 1 one chain, dc]*, rep across
Row 3: Ch 3, turn, 2dc into the same st, *sk the next 3 sts, [dc, ch 2, dc], sk the next 3 sts, 5dc into next st*, rep to eor; sk the next 3 sts, 3dc into the last st.
Row 4: Ch 4 (counts as a first dc + ch 1), turn, *[ch 1, sk the next st, dc]*, rep across The ch2 space from the previous row counts as one st.
Row 5: rep row 1. Ch 3, turn, dc in each st across.
For all sizes: Repeat Rows 2–5 until you have completed Row 25.
Pattern Note: Rows 2–5 form the 4-row stitch repeat used throughout the body of the top.
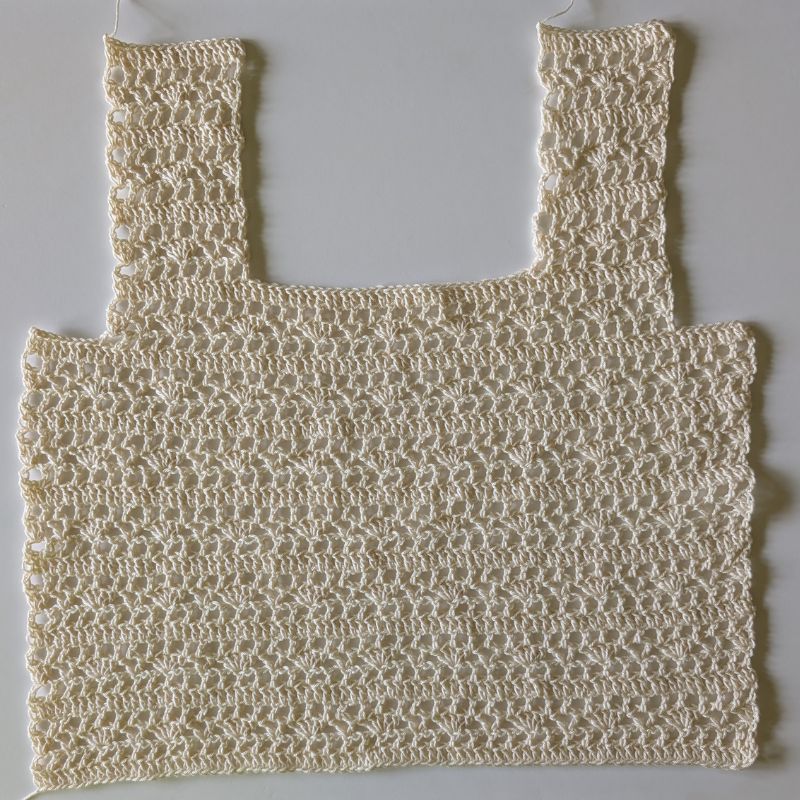
Aviana Crochet Lace Top: Back Panel
Shape Armholes
Row 26: With the panel right side facing, place a stitch marker in the 9th stitch from each side edge.
Turn, slip stitch in each stitch until you reach the first marked stitch.
Ch 4 (counts as the first dc and ch 1), then work Row 2 of the stitch pattern across until you reach the second marked stitch. Dc in the marked stitch. Leave the remaining stitches unworked.
Row 27: Repeat Row 3 of the stitch pattern.
For sizes XS, S, M and L: Repeat Rows 2–5 of the stitch pattern until you have completed Row 33.
For sizes XL, XXL and 3XL: Repeat Rows 2–5 of the stitch pattern until you have completed Row 37
Fasten off.
Aviana Crochet Lace Top: Right Strap
For sizes XS, S, M and L
With the panel right side facing, place a stitch marker in the 17th stitch from each side edge.
Row 34: Ch 4 (counts as the first dc and ch 1), then work Row 2 of the stitch pattern across to the marked stitch at the armhole edge. Dc in the marked stitch.
Row 35: Repeat Row 4.
Continue Strap
Repeat Rows 2–5 until complete Row 41.
Fasten off.
For sizes XL, XXL and 3XL
Row 38: Ch 4 (counts as the first dc and ch 1), then work Row 2 of the stitch pattern across to the marked stitch at the armhole edge. Dc in the marked stitch.
Row 39: Repeat Row 4.
Continue Strap
Repeat Rows 2–5 until complete Row 45.
Aviana Crochet Lace Top: Left Strap
For sizes XS, S, M and L
With the right side facing, join yarn in the 17th stitch from the left neckline edge.
Row 34: Ch 4 (counts as the first dc and ch 1), then work Row 2 of the stitch pattern across to the marked stitch at the armhole edge. Dc in the last st.
Row 35: Repeat Row 4.
Continue Strap
Repeat Rows 2–5 until complete Row 41.
Fasten off.
For sizes XL, XXL and 3XL
Row 38: Ch 4 (counts as the first dc and ch 1), then work Row 2 of the stitch pattern across to the marked stitch at the armhole edge. Dc in the last stitch.
Row 39: Repeat Row 4.
Continue Strap
Repeat Rows 2–5 until complete Row 45.
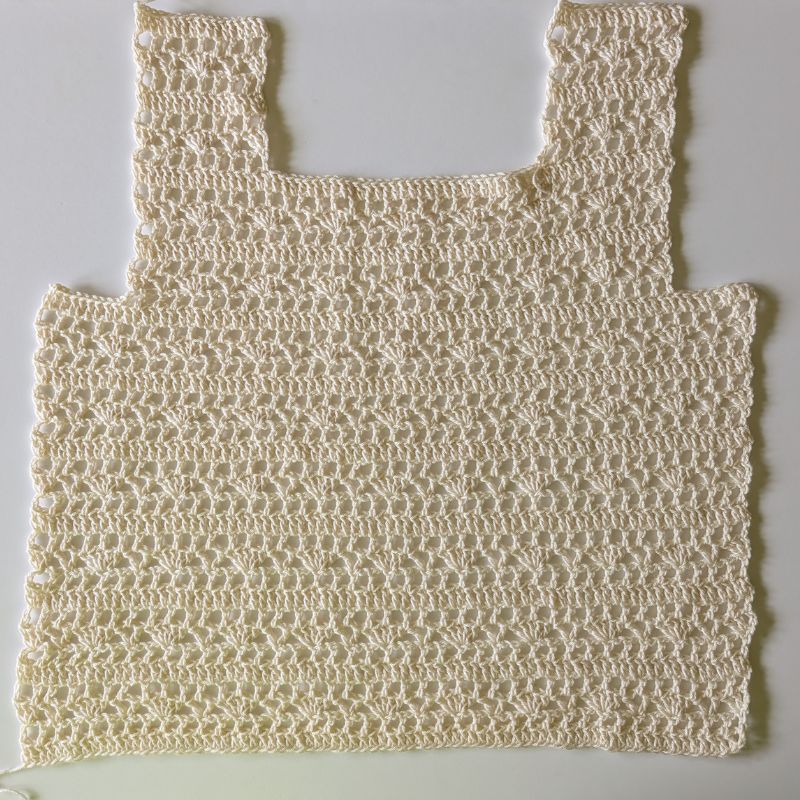
Aviana Crochet Lace Top: Front Panel
Shape Armholes
Row 26: With the panel right side facing, place a stitch marker in the 9th stitch from each side edge.
Turn, slip stitch in each stitch until you reach the first marked stitch.
Ch 4 (counts as the first dc and ch 1), then work Row 2 of the stitch pattern across until you reach the second marked stitch. Dc in the marked stitch. Leave the remaining stitches unworked.
Row 27: Repeat Row 3 of the stitch pattern.
For sizes XS, S, M and L: Repeat Rows 2–5 of the stitch pattern until you have completed Row 29.
For sizes XL, XXL and 3XL: Repeat Rows 2–5 of the stitch pattern until you have completed Row 33
Fasten off.
Aviana Crochet Lace Top: Right Strap
For sizes XS, S, M and L
With the panel right side facing, place a stitch marker in the 17th stitch from each side edge.
Row 30: Ch 4 (counts as the first dc and ch 1), then work Row 2 of the stitch pattern across to the marked stitch at the armhole edge. Dc in the marked stitch.
Row 31: Repeat Row 4.
Continue Strap
Repeat Rows 2–5 until complete Row 41.
Fasten off.
For sizes XL, XXL and 3XL
Row 34: Ch 4 (counts as the first dc and ch 1), then work Row 2 of the stitch pattern across to the marked stitch at the armhole edge. Dc in the marked stitch.
Row 35: Repeat Row 4.
Continue Strap
Repeat Rows 2–5 until complete Row 45.
Aviana Crochet Lace Top: Left Strap
For sizes XS, S, M and L
With the right side facing, join yarn in the 17th stitch from the left neckline edge.
Row 30: Ch 4 (counts as the first dc and ch 1), then work Row 2 of the stitch pattern across to the marked stitch at the armhole edge. Dc in the marked stitch.
Row 31: Repeat Row 4.
Continue Strap
Repeat Rows 2–5 until complete Row 41.
Fasten off.
For sizes XL, XXL and 3XL
Row 34: Ch 4 (counts as the first dc and ch 1), then work Row 2 of the stitch pattern across to the marked stitch at the armhole edge. Dc in the marked stitch.
Row 35: Repeat Row 4.
Continue Strap
Repeat Rows 2–5 until complete Row 45.
Assembly Instructions for the Aviana Crochet Lace Top
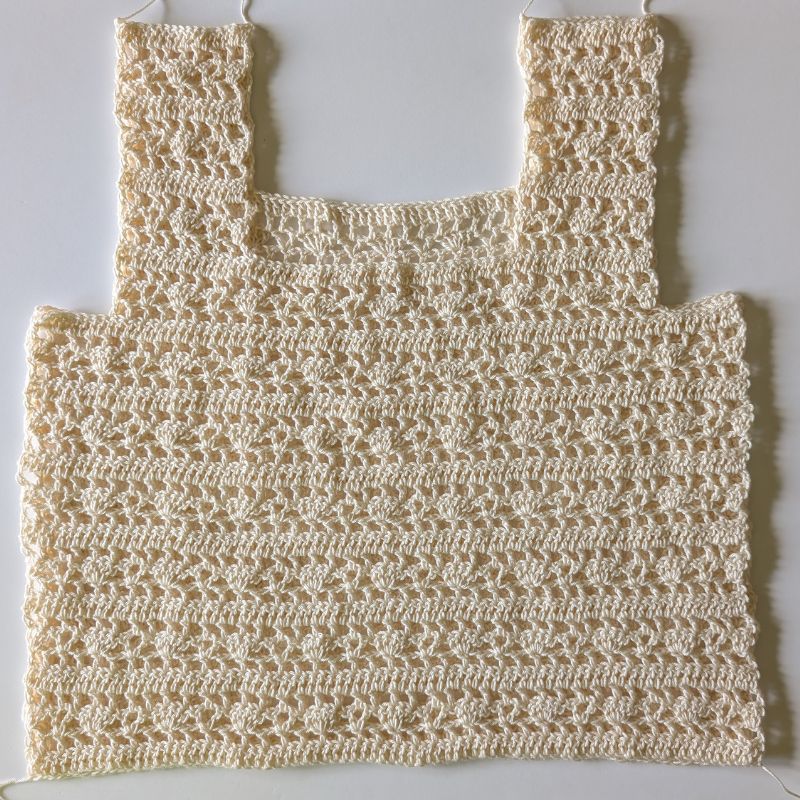
Place the front and back panels together with the right sides facing each other.
Sew the shoulder seams first, making sure both straps align evenly. Next, sew the side seams, leaving the arm openings unworked. Use your preferred joining method, such as whip stitch or mattress stitch, for a neat and nearly invisible seam.
Aviana Crochet Lace Top: Neckline and Armhole Edging
After assembling the top, add the finishing edging around the neckline, armholes, and bottom edge if desired. This simple finishing touch creates a clean, professional look while helping the edges lay flat.
Round 1: With the right side (RS) facing, join the yarn in any stitch along the neckline or armhole edge. Ch 3 (counts as the first leg of the cluster), then work 2 dc together (dc2tog) in the same stitch to complete the cluster.
Begin the repeat: *Skip the next 2 stitches, then work 1 slip stitch in the next stitch, then work (ch 3, dc2tog) in the next stitch.
Repeat from * to * evenly around the entire edge. Join with a slip stitch to the top of the first cluster to finish the round.
About the Edging
This simple edging creates a delicate decorative finish around the neckline and armholes. The alternating dc2tog clusters and slip stitches form a subtle scalloped effect that complements the lace stitch pattern without adding bulk, giving the top a clean and polished look.
Note: As you work around the curved edges, you may need to slightly adjust where you place the repeats to keep the edging lying flat. Aim to space the stitches as evenly as possible without stretching or puckering the fabric.
Aviana Crochet Lace Top: Bottom Border
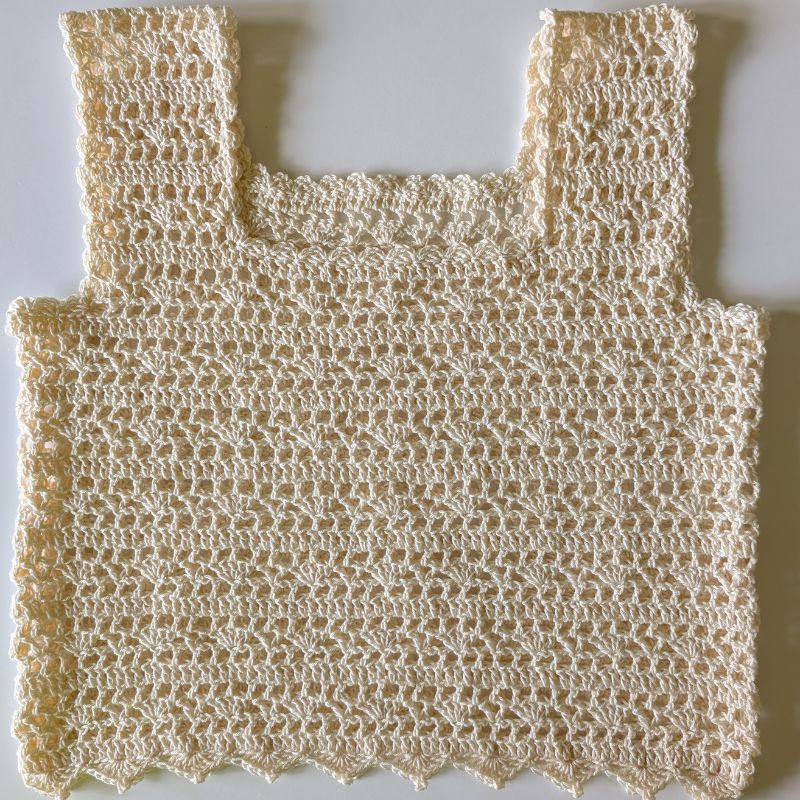
The bottom edging is made by alternating decorative picot shells with pairs of single crochet stitches. Each shell is worked into a single stitch, while the skipped stitches between motifs allow the edging to drape beautifully and create a delicate scalloped finish.
Round 1: With the right side (RS) facing, join the yarn in the right corner of the bottom edge. Ch 1, then work 1 sc in the same stitch.
Begin the repeat: *Skip the next 3 stitches, then work (3 dc, ch 3, sl st in the base of the ch-3 to form a picot, 2 dc) all in the next stitch to create a decorative shell. Skip the next 3 stitches, then work 1 sc in each of the next stitch.
Repeat from * to * all the way across the bottom edge. Join with a slip stitch to the first sc to finish the round.
Aviana Crochet Lace Top: Video Tutorial
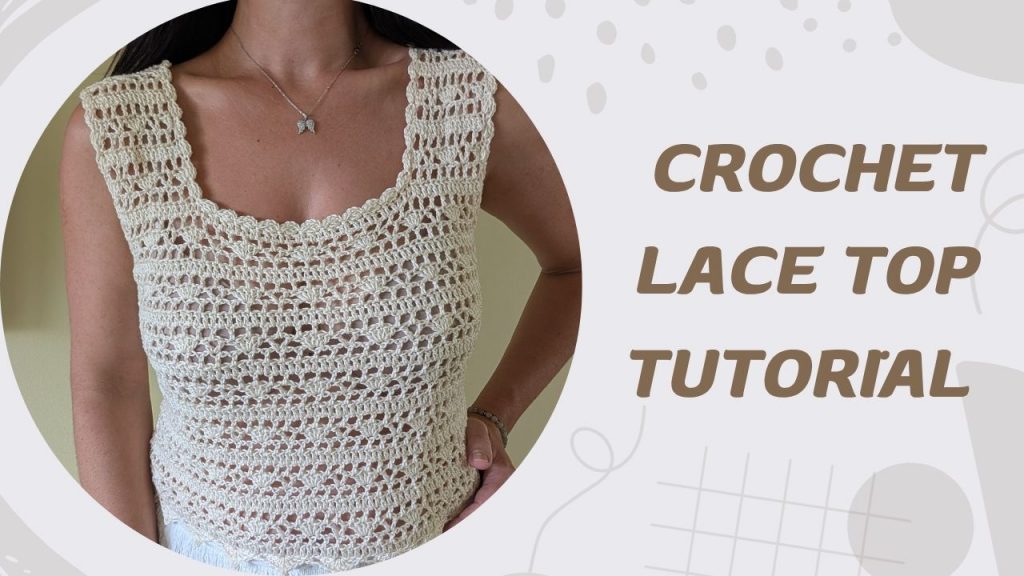
If you prefer learning visually, you can follow along with the complete YouTube video tutorial. I’ll guide you through every step of the process, from creating the foundation chain to assembling and finishing your Aviana Crochet Lace Top.
Whether you’re making your first garment or adding another handmade piece to your wardrobe, the video tutorial is there to help you crochet with confidence.
If you love making lightweight garments, be sure to check out my collection of crochet lace summer tops. From airy tank tops to elegant lace designs, you’ll find plenty of free crochet patterns that are perfect for warm-weather wear. Whether you’re looking for a quick weekend project or your next favorite handmade top, you’ll find more inspiration in my Crochet Summer Top Collection.
Final Thoughts
I hope you enjoy making the Aviana Crochet Lace Top as much as I enjoyed designing it. This elegant crochet lace top is simple to construct, relaxing to work on, and versatile enough to wear throughout the warmer months.
If you make one, I’d love to see your finished project! Share your photos on social media and tag me so I can celebrate your beautiful creation. Happy crocheting! 🩷